
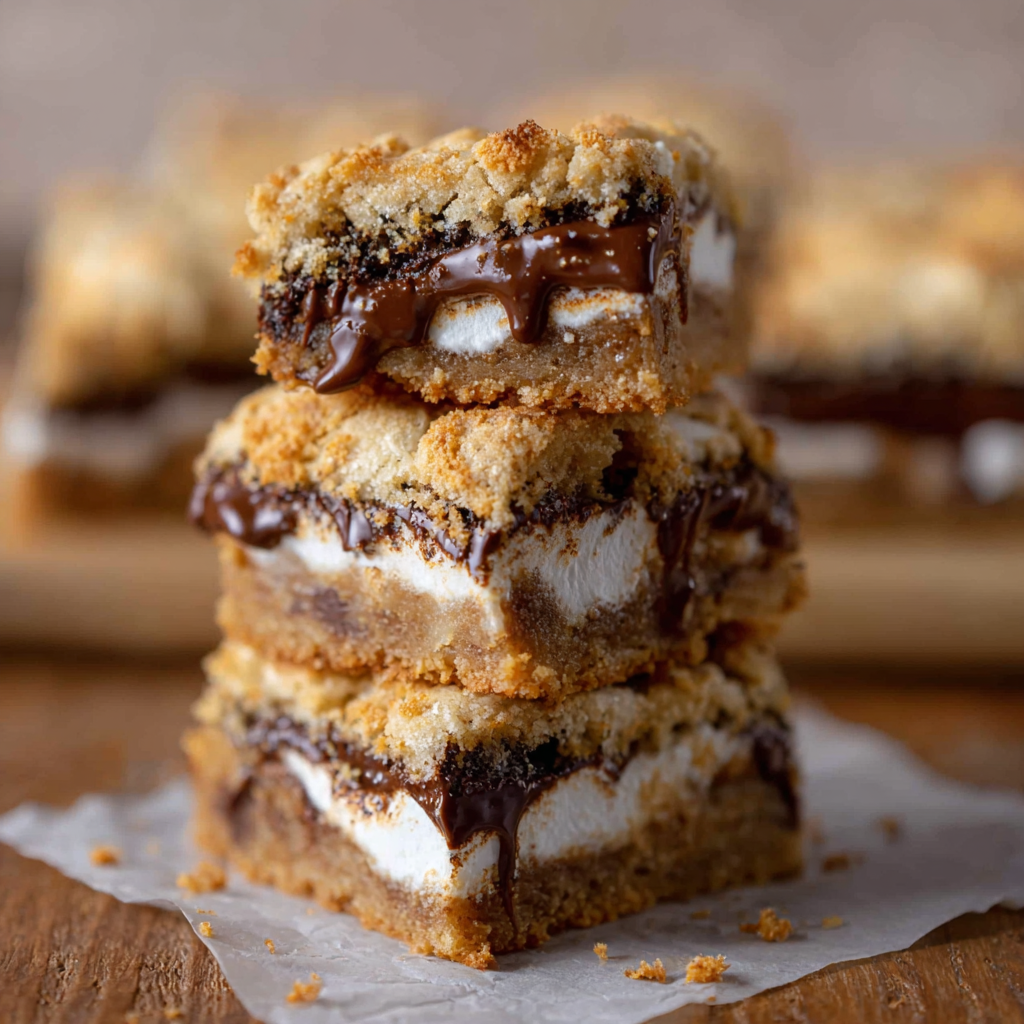
S’mores Cookie Bars

A nostalgic mash-up of chewy cookie dough, melty milk chocolate, and pillowy marshmallow — these s’mores cookie bars bring campfire flavor to an 8×8 pan for easy sharing.
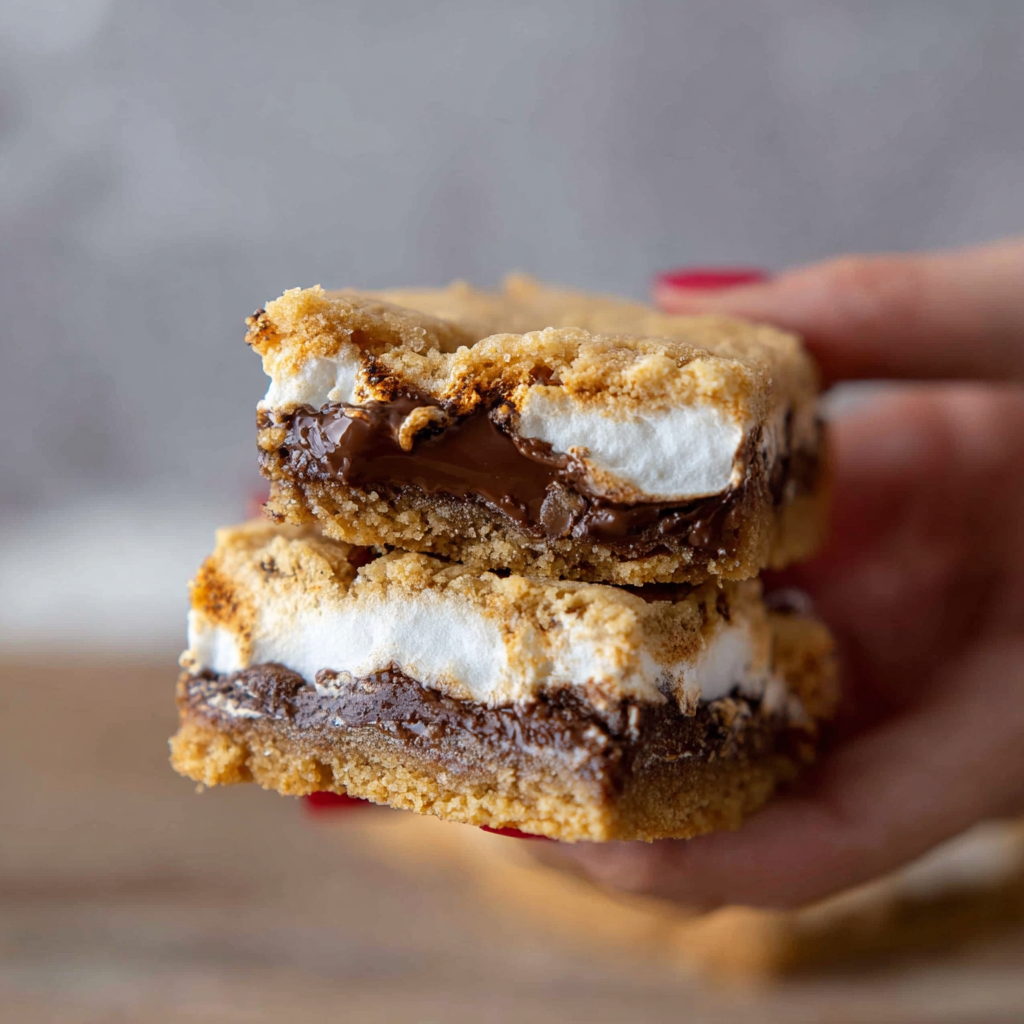
This recipe grew out of a weekend when I wanted the warm, toasty magic of campfire s'mores without the fuss of building a fire. I discovered this combination one rainy afternoon while craving something chocolatey and nostalgic. The concept is simple: a sturdy cookie base, a generous layer of milk chocolate, and a cloud of marshmallow — all sandwiched and baked just long enough to set the layers and keep the marshmallow soft and gooey. The finished bars have a chewy edge, a tender crumb in the center, and that unmistakable melty, slightly caramelized marshmallow top. Every bite takes me back to summer nights and sticky fingers, but packaged neatly so you can enjoy it at home or bring it to a potluck.
I first shared these bars with friends and family during a holiday cookie swap, and they disappeared in minutes. What makes them special is the texture contrast: the slightly crisp, buttery cookie gives way to velvet chocolate and a pillowy marshmallow ribbon. They’re reliable to make, forgiving if you overmix slightly, and scalable — you can double the batch for a sheet pan. I often swap the milk chocolate for dark chocolate when I want a less sweet counterpoint, or add a few toasted almonds for crunch. These bars are an instant crowd-pleaser and a comforting tray-bake for cold evenings.
Why You'll Love This Recipe
- Hands-off assembly: press half the dough, layer chocolate and marshmallow, top with the second dough slab — minimal shaping and no piping required.
- Uses pantry staples you likely already have: butter, sugar, flour, graham crumbs, and standard candy bars — ready in about 45 minutes start to finish.
- Kid-friendly and party-ready: these bars travel well and slice into neat squares for gatherings or lunchboxes.
- Make-ahead friendly: you can freeze a dough slab or the finished bars for easy future treats, saving time on busy days.
- Customizable: swap milk chocolate for dark, use crunchy peanut butter, or scatter nuts for texture without changing the technique.
I remember the first time a neighbor requested the recipe after trying a square — they loved that it delivered the exact campfire memories without the smoky grill. Over the years I’ve refined the ratio of graham crumbs in the dough so the cookie tastes like s’mores without being crumbly. My kids now ask for these at every gathering, and I’ve learned how to chill and flip the dough layers cleanly so the sandwich comes together perfectly every time.
Ingredients
- Butter (1/2 cup): Use unsalted or lightly salted butter at room temperature. Real butter gives the best flavor and structure; I prefer Plugrá or European-style butter for a richer taste.
- Brown sugar (1/3 cup): Light brown sugar adds moisture and a hint of molasses. Pack it lightly for accurate measurement.
- Granulated sugar (1/4 cup): Balances the brown sugar and helps with browning and structure.
- Egg (1 large): Brings richness and helps bind the dough. Use a large egg at room temperature for even mixing.
- Vanilla extract (1 tsp): Real vanilla amplifies the caramel notes. I recommend pure vanilla extract over imitation.
- All-purpose flour (1 1/2 cups): The structural backbone. Spoon and level when measuring to avoid a dry dough.
- Graham crackers, finely crushed (1/2 cup): About 3 to 4 full sheets. These add classic s’mores flavor and a slight toasty note — I crush them in a bag with a rolling pin for even texture.
- Salt (1/4 tsp) and Baking soda (3/4 tsp): Salt brightens flavors and baking soda keeps the dough tender with a slight lift.
- Milk chocolate bars (5 standard Hershey bars): Arrange pieces to cover the pan — the chocolate layer softens into a glossy middle while baking.
- Marshmallow fluff (1 1/2 cups): Also labeled marshmallow creme; spreadable and stable in the oven so you get that marshmallow ribbon without melting into nothing.
Instructions
Step 1: Prep the pan and oven Preheat the oven to 350°F (177°C). Line an 8×8-inch baking pan with parchment paper with an overhang on two sides for easy lifting. This ensures clean edges and makes refrigeration easier when you chill one dough slab. Step 2: Cream butter and sugars Cream 1/2 cup softened butter with 1/3 cup packed brown sugar and 1/4 cup granulated sugar until light and slightly fluffy, about 2 to 3 minutes with a hand or stand mixer on medium speed. Scrape the bowl and add 1 large room-temperature egg and 1 teaspoon vanilla; mix until just combined. Overbeating after adding the egg can incorporate too much air and change the texture, so stop when the mixture looks uniform. Step 3: Add dry ingredients Whisk together 1 1/2 cups all-purpose flour, 1/2 cup finely crushed graham crackers, 1/4 teaspoon salt, and 3/4 teaspoon baking soda. Add the dry mix to the butter-sugar mixture and fold with a spatula or low mixer speed until no dry streaks remain. The dough should be soft but hold together; avoid overmixing to keep the bars tender. Step 4: Form the bottom slab Press about half of the dough evenly into the prepared pan, using the bottom of a measuring cup for an even surface. Place the parchment-lined pan with the dough slab in the freezer for 10 to 15 minutes; chilling makes it easier to flip the slab without cracking. Step 5: Prepare the top slab While the first slab chills, re-line the pan with fresh parchment and press the remaining dough into an even shape on the paper. Chill briefly if it becomes tacky — a slightly firm dough is easier to flip without tearing. Step 6: Assemble the layers On the chilled bottom slab, arrange broken pieces of 5 standard Hershey bars to cover the surface evenly. Spread 1 1/2 cups marshmallow fluff over the chocolate in an even layer. Carefully remove the top dough slab from the second lined parchment and invert it over the marshmallow layer, aligning edges and pressing lightly to seal the sandwich. If the dough cracks, press pieces back together with your fingers. Step 7: Bake and cool Bake at 350°F for about 25 minutes until the top is set and golden at the edges. The marshmallow will puff slightly but should remain soft. Once out of the oven, cool the pan completely on a wire rack — at least 1 hour — before lifting the bars using the parchment overhang. Chilling briefly makes slicing cleaner and reveals the pretty cross-section of cookie, chocolate, and marshmallow.
You Must Know
- These bars keep well in an airtight container at room temperature for up to 2 days; refrigeration extends freshness to 4 days.
- They freeze well for up to 3 months; wrap slices individually in plastic and store in a freezer-safe bag.
- High in sugar and butter — treat them as an occasional indulgence rather than an everyday snack.
- For clean slices, chill the pan until firm and use a sharp knife warmed under hot water, wiping between cuts.
My favorite aspect is the way the marshmallow softens without disappearing — it creates a ribbon that contrasts with the butteriness of the cookie and the sheen of the melted chocolate. At a recent family brunch everyone reached for seconds and commented on how the bars tasted like a roasted campfire treat without any mess. The simplicity of layering means you can focus on perfecting each component.
Storage Tips
Store completely cooled bars in an airtight container. At room temperature they remain pleasant for two days; refrigeration keeps them safe and firmer for up to four days, though the marshmallow will firm slightly. For longer storage, wrap individual bars tightly in plastic wrap and place them in a sealed freezer bag for up to three months. To thaw, move bars to the refrigerator overnight, then bring to room temperature for 30 minutes before serving. Reheat single portions for 10–15 seconds in the microwave to restore gooeyness.
Ingredient Substitutions
If you don’t have graham crackers, substitute 1/2 cup digestive biscuits or shortbread crumbs for a similar texture; the flavor will shift slightly. Swap the Hershey bars for 8 ounces of chopped chocolate—either milk or dark—for a more even chocolate layer. If marshmallow fluff isn’t available, use an extra layer of mini marshmallows (about 2 cups) toasted briefly under a broiler for color, watching closely to avoid burning. For a lower-sugar twist, try 60–70% dark chocolate and cut the granulated sugar to 3 tablespoons, though texture will be a touch denser.
Serving Suggestions
Serve warm with a scoop of vanilla ice cream for a decadent dessert, or alongside fresh berries to balance sweetness. For a party, cut into small squares and arrange on a platter dusted lightly with cocoa or graham cracker crumbs. Garnish with a sprinkle of flaky sea salt on the top for a salted-sweet contrast, or drizzle with caramel for a fancier presentation. These bars also pair well with a robust coffee or a glass of cold milk to echo the childhood memory of campfire treats.
Cultural Background
The s’mores concept dates back to early 20th-century North American camping culture — a simple three-ingredient sandwich of graham cracker, chocolate, and toasted marshmallow. These bars translate that campfire ritual into a baked tray format, marrying cookie-baking techniques with the nostalgia of s’mores. Regional variations exist: some add peanut butter or use dark chocolate for a more sophisticated edge. Turning s’mores into a bar is part of a larger trend of portable, shareable desserts popular at potlucks and holiday gatherings.
Seasonal Adaptations
In cooler months, enrich the dough with a tablespoon of molasses and a pinch of cinnamon for warming spice. For summer gatherings, swap in salted caramel candies between the layers or sprinkle toasted coconut on top for a tropical nod. Holiday versions might include crushed peppermint between the chocolate and marshmallow for a festive crunch. The technique remains the same, so seasonal flavors can be introduced without altering bake time significantly.
Meal Prep Tips
Make the dough up to 48 hours in advance and refrigerate tightly wrapped; press and assemble on the day of baking for the freshest texture. Alternatively, freeze the assembled, unbaked pan (wrapped well) for up to one month — thaw in the refrigerator overnight and bake a few minutes longer. Slice into portions before freezing for grab-and-go treats. Use sturdy, freezer-safe containers for transport to events to prevent squashing the marshmallow layer.
Success Stories
Readers have told me these bars were the hit of cookie swaps and bake sales, with one friend reporting that they sold out within an hour at her office party. Another reader adapted the recipe using dark chocolate and toasted hazelnuts, calling it “grown-up campfire.” I’ve brought these to family reunions and watched kids compare them to s’mores made over real flames — the verdict is always the same: nostalgic, comforting, and deceptively simple.
These bars are an invitation to play with texture and flavor while delivering a reliable, crowd-pleasing result. Whether you’re re-creating campfire memories or inventing new traditions, they’re an easy way to share something indulgent and familiar. Make a pan, invite friends, and enjoy the sticky, sweet delight together.
Pro Tips
Press the dough evenly using the bottom of a measuring cup to create a uniform slab that chills and flips cleanly.
Chill the bottom slab in the freezer for 10–15 minutes to make flipping easier and reduce tearing.
For clean slices, refrigerate the baked pan until firm, then warm a knife under hot water and wipe it between cuts.
If the marshmallow fluff becomes too stiff to spread, warm it briefly in a bowl over simmering water until pliable.
To prevent soggy bottoms, ensure the cookie dough is packed firmly and the chocolate is evenly distributed.
This nourishing s’mores cookie bars recipe is sure to be a staple in your kitchen. Enjoy every moist, high protein slice — it is perfect for breakfast or as a wholesome snack any time.
Tags
S’mores Cookie Bars
This S’mores Cookie Bars recipe makes perfectly juicy, tender, and flavorful steak every time! Serve with potatoes and a side salad for an unforgettable dinner in under 30 minutes.
Ingredients
Cookie dough
Assembly
Instructions
Preheat and prepare pan
Preheat oven to 350°F (177°C). Line an 8×8-inch pan with parchment paper leaving an overhang for easy removal. Set aside.
Cream butter and sugars
Cream 1/2 cup softened butter with 1/3 cup brown sugar and 1/4 cup granulated sugar until light, then mix in 1 large egg and 1 teaspoon vanilla until just combined.
Combine dry ingredients
Whisk 1 1/2 cups flour, 1/2 cup crushed graham crackers, 1/4 teaspoon salt, and 3/4 teaspoon baking soda. Add to wet ingredients and mix until no dry streaks remain.
Form and chill bottom slab
Press half the dough into the prepared pan evenly, then freeze the lined pan for 10–15 minutes to firm the slab for flipping.
Prepare top slab
Line a second sheet of parchment, press remaining dough into an even slab and chill briefly until firm but pliable.
Layer chocolate and marshmallow
Arrange broken chocolate pieces over the chilled bottom slab, spread 1 1/2 cups marshmallow fluff evenly over the chocolate.
Flip and seal
Invert the top dough slab over the marshmallow layer, align edges and press lightly to seal. Repair any cracks with small dough pieces.
Bake and cool
Bake at 350°F for 25 minutes until edges are golden and the top is set. Cool completely on a wire rack for at least 1 hour before slicing.
Last Step: Please leave a rating and comment letting us know how you liked this recipe! This helps our business to thrive and continue providing free, high-quality recipes for you.
Nutrition
Did You Make This?
Leave a comment & rating below or tag
@easywhiskrecipes on social media!
Categories:
You might also like...

Instant Pot Creamy Chicken and Rice
A quick and comforting one pot dinner of tender chicken, creamy rice, and vegetables cooked together in the Instant Pot for an easy weeknight meal.

Cinnamon Roll Pancake Stacks
Fluffy pancakes swirled with a warm cinnamon filling and finished with a silky cream cheese glaze. Perfect for weekend brunches and cozy mornings.

Caramel Apple Cheesecake Bars
Buttery graham crust, creamy cheesecake, spiced Granny Smith apples, crunchy streusel, and a ribbon of homemade caramel — perfect dessert bars for gatherings.
Did You Make This?
Leave a comment & rating below or tag @easywhiskrecipes on social media!
Rate This Recipe
Share This Recipe
Enjoyed this recipe? Share it with friends and family, and don't forget to leave a review!
Comments (1)
This recipe looks amazing! Can't wait to try it.
Comments are stored locally in your browser. Server comments are displayed alongside your local comments.

Hi, I'm Sophie!
What's Popular

30-Minute Meals!
Join to receive our email series which contains a round-up of some of our quick and easy family favorite recipes.