
Salted Peppermint Bark

A festive, crunchy chocolate bark layered with light cocoa and creamy white coating, bright peppermint pieces and a kiss of sea salt — perfect for gifting or holiday snacking.

This salted peppermint bark has been my holiday lifesaver for years: a simple, impressive treat that's as joyful to make as it is to give. I first learned this layered technique while helping at a community bake sale one December, where we needed something fast, beautiful, and cost-effective. The combination of a smooth, light cocoa layer topped with creamy white coating, shards of crushed peppermint, and a finishing sprinkle of sea salt creates a delightful contrast of sweet, minty and saline notes that keeps people coming back for more. The texture is an irresistible mix of snap and creaminess — each piece breaks cleanly while melting luxuriously on the tongue.
I keep the pantry stocked with melting wafers and peppermint candies all season because this recipe is dependable and forgiving. It transforms quickly: what looks like a professional confection is really a few careful steps and a bit of patience. Whether I’m portioning pieces into little cellophane bags for neighbors or serving them on a platter for a cozy night in, the aroma of peppermint and chocolate filling the kitchen always signals that the holidays have truly arrived.
Why You'll Love This Recipe
- Fast and fuss-free: ready in about 25 minutes of active time and sets at room temperature, making it perfect for last-minute gifts and gatherings.
- Minimal ingredients: uses pantry-friendly melting wafers or chocolate chips and crushed peppermints — no tempering necessary.
- Big impact: visually striking two-tone layers with crunchy peppermint make it feel artisanal while staying beginner-friendly.
- Make-ahead friendly: can be stored chilled or frozen and broken into pieces when needed, saving time during busy holiday prep.
- Customizable: swap in dark chocolate, add nuts, or use different flavored extracts for variety without changing technique.
- Great for gifting: packages beautifully in clear bags or tins and travels well when kept cool.
In my kitchen this has become the go-to edible gift. One year I made three dozen sheets to fill tins, and neighbors still ask about the ones with extra sea salt — the little flakes really elevate the chocolate. The recipe’s simplicity means I can increase quantities with confidence, and friends love that the pieces stay crisp even after a few days in an airtight tin.
Ingredients
- Light cocoa candy melts (24 ounces): Choose high-quality candy melts or semisweet chocolate chips; the lighter cocoa gives a milder chocolate base that pairs well with the sweet white layer. I like using brand-name melting wafers for consistent melting behavior.
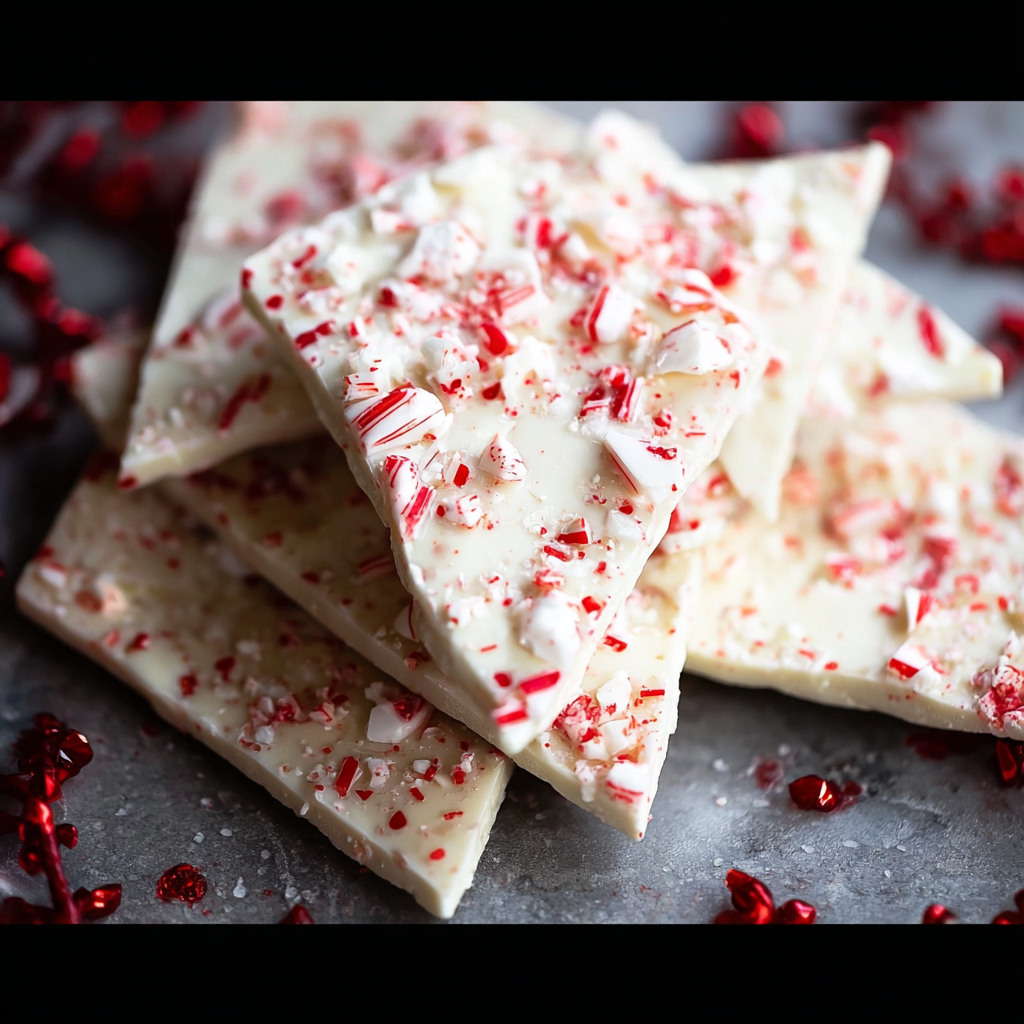
- White almond bark (20 ounces): This provides the creamy, glossy top layer. If you prefer a less sweet option, substitute white chocolate chips or white melting wafers. Note that almond bark often contains almond flavoring.
- Peppermint extract (1 teaspoon, oil-based): Oil-based peppermint extract disperses evenly in melted fat-based coatings. Start with 1 teaspoon — you can add a touch more for stronger mint presence, but avoid overdoing it or the flavor turns medicinal.
- Crushed peppermint (3 ounces): Approximately 3 ounces of crushed hard peppermint candies (about 1 packed cup). Crush by pulsing in a food processor or placing in a resealable bag and pounding with a rolling pin for varied shard sizes.
- Sea salt flakes (1 1/2 teaspoons): Use large flaky sea salt (Maldon or similar) to finish; the flakes provide a delicate crunch and a burst of flavor that accentuates the chocolate and mint.
Instructions
Prepare the work area: Line a half-sheet pan or a large cookie sheet with parchment or wax paper, leaving a small overhang to help lift the set bark later. Have a small bowl ready for crushed peppermint and a bench scraper or offset spatula for spreading. Melt the light cocoa coating: Using a double boiler or microwave-safe bowl, gently melt the 24 ounces of light cocoa candy melts. If using microwave, heat in 30-second bursts, stirring thoroughly between bursts until smooth. Aim for about 110–115°F as the working temperature; you want completely fluid chocolate without scorching. Pour and even out the base: Pour the melted chocolate onto the prepared sheet and use an offset spatula to spread to an even thickness, roughly 1/8 to 1/4 inch depending on how thick you like your pieces. Let it sit at room temperature for a few minutes until barely tacky — partially set but still warm to the touch. This helps the top layer adhere without mixing. Melt the white layer and flavor: Melt the 20 ounces of white almond bark in a clean double boiler or microwave using the same gentle method. Stir continuously for an even texture. When smooth, stir in the 1 teaspoon oil-based peppermint extract. Taste a tiny bit (if cooled) to check balance — peppermint should be noticeable but not overpowering. Top and decorate: Pour the white coating over the still-tacky base and quickly spread to the edges. Immediately sprinkle the crushed peppermint evenly across the surface, then scatter the sea salt flakes on top. Press very lightly with the spatula if you want shards to adhere more firmly. Set and cut: Allow the bark to set at room temperature for 1–2 hours until completely firm, or speed up by placing the pan in the refrigerator for 20–30 minutes. Lift from the pan using the parchment overhang and cut into pieces with a sharp knife, or break into rustic shards by hand for a more casual look.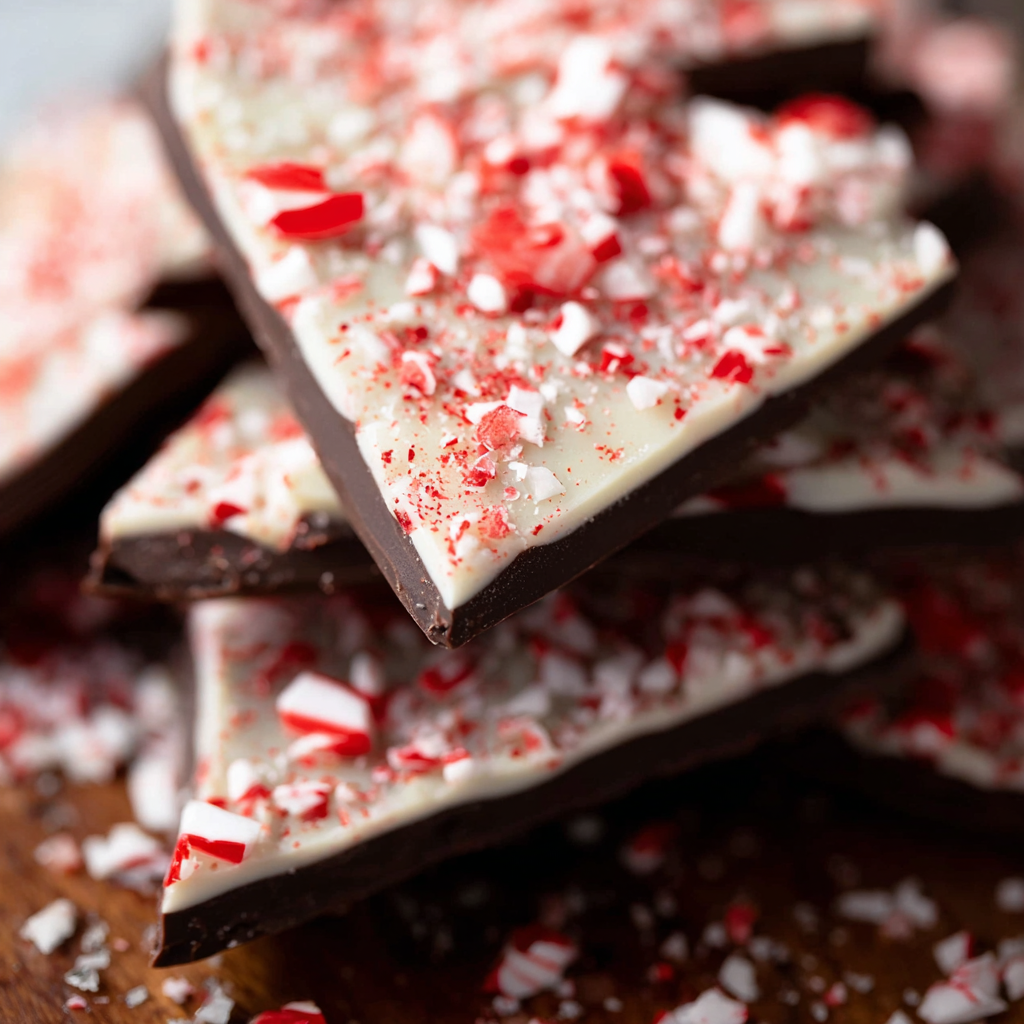
You Must Know
- This yields approximately 24 medium-sized pieces depending on thickness — store chilled or at cool room temperature in an airtight container.
- Do not overheat coatings: keep microwave bursts short and stir frequently to avoid grainy texture from seized chocolate.
- Oil-based extracts work best with fat-based coatings; water-based extracts can cause white coatings to seize or separate.
- Freezes well for up to 3 months; thaw in the refrigerator to maintain crispness and avoid condensation.
- When crushing peppermints, leave a mix of fine dust and larger shards for visual interest and texture contrast.
My favorite thing about this dessert is how adaptable it is: a small change like switching to dark chocolate or adding a handful of toasted pistachios instantly shifts the character. Family and friends always comment on the sea salt — the flake size matters because small grains disappear while large flakes provide that delightful hit. When I give this away in tins, I include a small note to keep it refrigerated in warm climates to avoid melting during transit.
Storage Tips
Place pieces in a single layer in an airtight container lined with parchment; separate layers with additional parchment to prevent sticking. At cool room temperature (below 68°F) the bark will keep well for up to 2 weeks. For longer storage, freeze in a well-sealed tin for up to 3 months, and thaw in the refrigerator overnight before serving to avoid condensation on the surface. Avoid storing near strong odors — chocolate absorbs surrounding smells easily — and don’t leave in direct sunlight or near heat sources.
Ingredient Substitutions
If you don’t have light cocoa melts, semisweet or even dark chocolate chips can be used — choose brand-name chips for better melt quality. For the white layer, real white chocolate chips provide richer flavor but may be slightly more brittle; melting wafers or almond bark melt more predictably. If you prefer a nut-free option, use a white coating labeled nut-free rather than almond bark. For peppermint, crushed candy canes or peppermint-flavored baking pieces work just as well; reduce extract slightly if your crushed candies are intensely flavored.
Serving Suggestions
Serve broken into rustic shards on a festive platter or packaged in clear cello bags tied with ribbon for gifts. Pair with hot cocoa, espresso, or a dessert wine like vin santo for an elegant finish. Garnish trays with fresh mint leaves or edible gold leaf for special occasions. For parties, include small labels indicating "contains almonds" and whether pieces are dark-chocolate versions to help guests with preferences.
Seasonal Adaptations
In winter, use crushed red-and-white candy canes and add a pinch of cinnamon to the white layer for a warming nuance. For spring, swap peppermint for crushed dried strawberries and a touch of lemon zest on the white layer. For a Halloween twist, incorporate orange-flavored white coating and black lava salt as a dramatic finish. Small swaps in extract or topping allow the same technique to work year-round with seasonal flavors.
Meal Prep Tips
Make multiple sheets at once: use several lined baking sheets to produce gifts in bulk. Chill sheets briefly before stacking or packing to maintain firmness. When cutting, warm the knife slightly under hot water and dry it between cuts for cleaner edges. Label tins with production dates and ingredients if giving to others. If planning for a market or sale, package with a desiccant packet to reduce moisture exposure during transport.
Success Stories
One year I brought a tin to a block party and a neighbor introduced himself by asking if I would sell the recipe — he loved it that much. A family friend with a nut allergy asked if I could make a nut-free batch; by substituting nut-free white coating and adding toasted pumpkin seeds the crowd favorite repeated the next year. Small touches like the sea salt and varied peppermint shard sizes consistently earn compliments and make this an easy winner at bake sales and holiday tables.
Final note: enjoy the process. The simple ritual of melting, spreading, and sprinkling is both meditative and joyful, and the results are reliably wonderful. Share pieces with neighbors, tuck them into lunchboxes, or keep a jar by the coffee station — it’s the kind of recipe that becomes part of holiday memory-making.
Pro Tips
Heat chocolate gently in 30-second bursts in the microwave and stir between intervals to avoid scorching.
Let the base layer become just tacky before adding the top layer to prevent blending while ensuring good adhesion.
Use a mix of crushed peppermint sizes — some dust for flavor and fine texture, and larger shards for visual appeal.
Warm and dry your knife between cuts for neat pieces, or break by hand for a rustic presentation.
Store in a cool, dry place and add a desiccant packet when shipping to reduce moisture-related blooming.
This nourishing salted peppermint bark recipe is sure to be a staple in your kitchen. Enjoy every moist, high protein slice — it is perfect for breakfast or as a wholesome snack any time.
FAQs about Recipes
How long does peppermint bark keep?
Yes. Store in an airtight container in the refrigerator for up to two weeks or freeze for up to three months. Thaw in the refrigerator to avoid condensation.
Can I use regular peppermint extract?
Use oil-based peppermint extract for best dispersion in fat-based coatings; water-based extracts may cause texture issues.
What's the best way to cut the bark?
Use a sharp knife warmed under hot water and dried between cuts for cleaner edges, or break into rustic pieces by hand for a casual look.
Tags
Salted Peppermint Bark
This Salted Peppermint Bark recipe makes perfectly juicy, tender, and flavorful steak every time! Serve with potatoes and a side salad for an unforgettable dinner in under 30 minutes.
Ingredients
Main
Instructions
Prepare the baking sheet
Line a baking sheet with parchment or wax paper and set aside. Make sure you have all toppings and tools within reach before melting any coatings.
Melt the light cocoa coating
Gently melt 24 ounces of light cocoa candy melts in a double boiler or microwave (30-second bursts, stirring between) until smooth and fluid.
Spread the base layer
Pour the melted base onto the prepared sheet and spread with an offset spatula to an even 1/8–1/4 inch thickness. Let sit until barely tacky.
Melt the white coating and flavor
Melt 20 ounces of white almond bark using the same gentle method. Stir in 1 teaspoon oil-based peppermint extract once smooth.
Top and finish
Pour the white coating over the tacky base and spread quickly. Sprinkle crushed peppermint evenly and scatter sea salt flakes across the surface.
Set and portion
Allow to set fully at room temperature for 1–2 hours or refrigerate for 20–30 minutes. Lift bark on parchment and cut into pieces or break into shards.
Last Step: Please leave a rating and comment letting us know how you liked this recipe! This helps our business to thrive and continue providing free, high-quality recipes for you.
Nutrition
Did You Make This?
Leave a comment & rating below or tag
@easywhiskrecipes on social media!
Categories:
You might also like...

Instant Pot Creamy Chicken and Rice
A quick and comforting one pot dinner of tender chicken, creamy rice, and vegetables cooked together in the Instant Pot for an easy weeknight meal.

Cinnamon Roll Pancake Stacks
Fluffy pancakes swirled with a warm cinnamon filling and finished with a silky cream cheese glaze. Perfect for weekend brunches and cozy mornings.

Caramel Apple Cheesecake Bars
Buttery graham crust, creamy cheesecake, spiced Granny Smith apples, crunchy streusel, and a ribbon of homemade caramel — perfect dessert bars for gatherings.
Did You Make This?
Leave a comment & rating below or tag @easywhiskrecipes on social media!
Rate This Recipe
Share This Recipe
Enjoyed this recipe? Share it with friends and family, and don't forget to leave a review!
Comments (1)
This recipe looks amazing! Can't wait to try it.
Comments are stored locally in your browser. Server comments are displayed alongside your local comments.

Hi, I'm Sophie!
What's Popular

30-Minute Meals!
Join to receive our email series which contains a round-up of some of our quick and easy family favorite recipes.