
Pink Coconut Snowball Cake Bars

Soft chocolate cake bars topped with a sweet, pink-tinted coconut snow that’s playful, easy, and perfect for parties or afternoon tea.
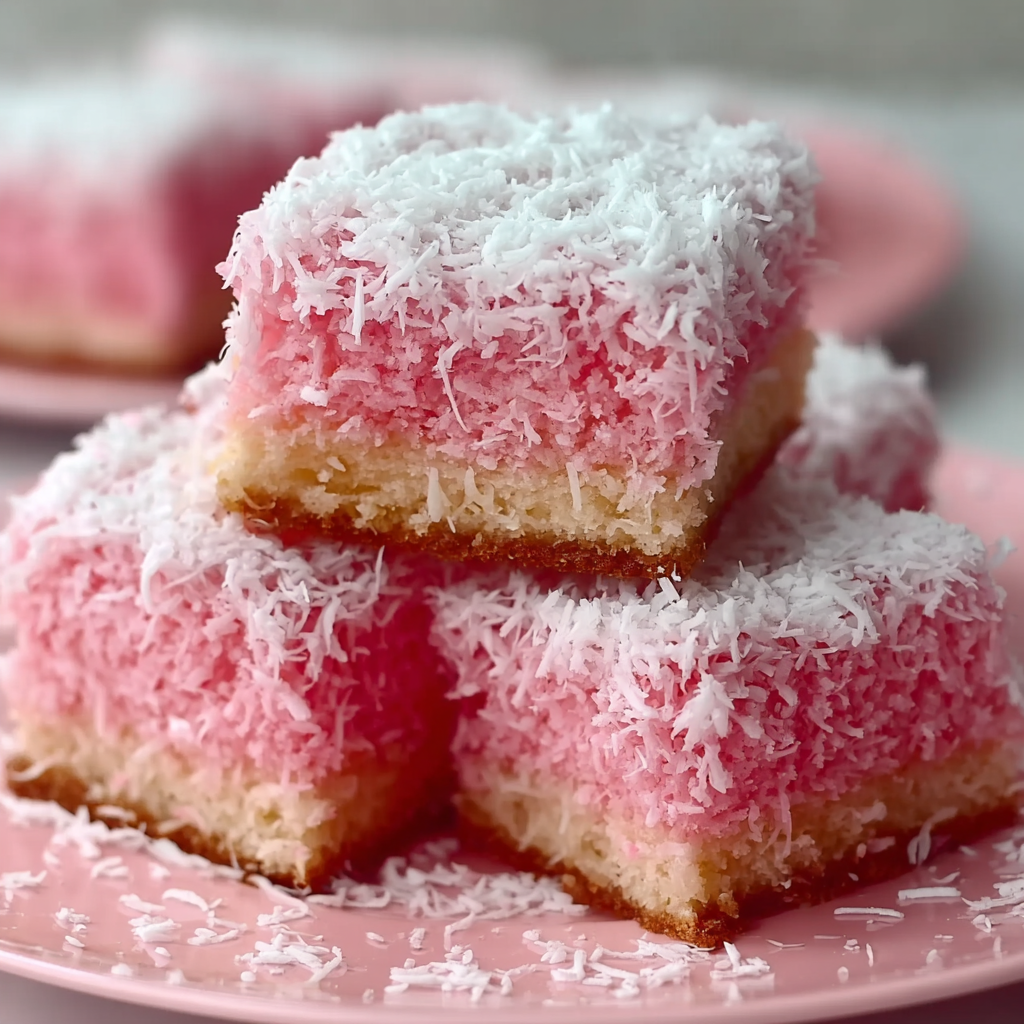
This simple chocolate cake transformed into Pink Coconut Snowball Cake Bars has been a happy accident in my kitchen. I first made these on a rainy afternoon when I wanted something that felt festive but didn’t demand a lot of fuss — a traybake that could be cut into bars, packed into a lunchbox, or placed on a dessert table without looking precious. The texture is what sold me: a tender, lightly chocolatey base with a moist crumb, crowned by a sweet, snowy coconut topping that can be tinted a delicate pink for a whimsical touch. Every bite is a contrast of soft cake and slightly chewy coconut, and the bars hold their shape nicely whether you serve them warm or chilled.
I discovered the combination while adapting a simple sheet cake recipe and trying to use the coconut I had in the pantry. The first batch became the centerpiece of a small birthday tea, and everyone asked for the recipe — even my skeptical aunt who usually favors classic butter cookies. I love that the recipe is approachable: no special equipment is required and the topping comes together in a minute. It’s the kind of thing you’ll make when you want something pretty and comforting at once.
Why You'll Love This Recipe
- Fast to assemble: the batter takes under 10 minutes to combine and bakes in about 20–25 minutes, so you can have a dessert ready in under an hour.
- Pan-friendly format: baked in a single square pan and cut into bars, great for serving a crowd or packing for picnics.
- Pantry staples: uses common ingredients — flour, sugar, cocoa, eggs, butter — plus shredded coconut you likely already have.
- Flexible topping: the coconut topping is forgiving — thin it with milk or coconut milk to the texture you prefer and tint it with food coloring or natural beet powder.
- Kid-friendly and festive: pink snowball topping makes these perfect for birthdays, baby showers, or seasonal treats without complicated decoration.
- Make-ahead friendly: the bars keep well and actually mellow in flavor after a day, making them perfect for prepping in advance.
I remember serving these at a small gathering and watching guests smile at the pale pink topping; someone compared them to childhood confections and another guest loved how the coconut texture balanced the soft cake. The recipe has become my go-to when I want dessert that’s cheerful but not fussy — it’s one of those crowd-pleasers that feels homemade in the best way.
Ingredients
- All-purpose flour (1.5 cups): Use a trusted brand like King Arthur or Gold Medal for a consistent crumb. Spoon and level the flour into your cup for accuracy — too much flour will make the bars dry.
- Granulated sugar (1 cup): Regular white sugar gives structure and sweetness; you can swap half for light brown sugar for a hint of molasses if you want a deeper flavor.
- Unsweetened cocoa powder (1/2 cup): Choose Dutch-processed for a smoother chocolate flavor, or natural cocoa for brighter acidity; both work but the taste will shift slightly.
- Baking powder (1 teaspoon) and salt (1/2 teaspoon): Leavening and seasoning balance the sweetness and ensure a light crumb.
- Unsalted butter, melted (1/2 cup): Salted can be used if you reduce added salt slightly. Melt and cool slightly so eggs won’t scramble when combined.
- Eggs (2 large): Bring to room temperature for even mixing and better rise.
- Vanilla extract (1 teaspoon): Pure vanilla adds warmth and depth; inexpensive imitation works in a pinch.
- Shredded coconut (1 cup): Use sweetened or unsweetened depending on how sweet you want the topping; sweetened gives a glossier finish.
- Powdered sugar (1/2 cup): Stabilizes and sweetens the coconut topping so it holds together when spread.
- Milk or coconut milk (1–2 tablespoons): Adjust to achieve a spreadable consistency — use coconut milk for a coconut-forward flavor.
- Pink food coloring (optional): A drop or two is enough for a soft pastel hue; gel colors are efficient so you don’t add extra liquid.
Instructions
Preheat and prepare:Preheat the oven to 350°F (175°C). Grease a 9x9-inch baking pan and line it with parchment, leaving a small overhang for easy removal. This ensures even baking and clean edges when you cut the bars.Combine dry ingredients:In a medium bowl, whisk together 1.5 cups all-purpose flour, 1 cup granulated sugar, 1/2 cup unsweetened cocoa powder, 1 teaspoon baking powder, and 1/2 teaspoon salt until evenly blended. Sifting the cocoa and flour together helps avoid lumps and distributes leavening.Mix wet ingredients:In a separate bowl, beat together 1/2 cup melted unsalted butter, 2 large eggs, and 1 teaspoon vanilla extract until smooth and slightly glossy. Warm butter dissolves sugar more readily and helps create a tender crumb.Combine batter:Fold the wet mixture into the dry ingredients, stirring just until combined. Do not overmix — a few small streaks of flour are fine. Overworking develops gluten and can produce a tougher texture.Bake the base:Pour the batter into the prepared pan, smoothing the top with a spatula. Bake for 20–25 minutes, checking with a toothpick at around 18 minutes; it should come out with a few moist crumbs but not wet batter. Allow the cake to cool completely in the pan on a wire rack.Prepare coconut topping:Mix 1 cup shredded coconut with 1/2 cup powdered sugar in a small bowl. Add 1–2 tablespoons milk or coconut milk, a little at a time, until the mixture reaches a spreadable consistency. Add a drop or two of pink food coloring and stir until color is even.Assemble and cut:Once the cake is fully cool, spread the coconut mixture evenly over the top using an offset spatula. Chill briefly to set the topping if you prefer clean slices, then use a sharp knife to cut into 12 bars. Clean the knife between cuts for neat edges.
You Must Know
- These bars keep well stored in an airtight container in the refrigerator for up to 5 days; bring to room temperature before serving for softer texture.
- You can freeze the uncut cake (wrapped airtight) for up to 3 months; thaw fully before adding the coconut topping.
- Using coconut milk in the topping enhances coconut flavor and helps bind the powdered sugar for a glossy finish.
- This recipe contains gluten, dairy, eggs, and coconut — not suitable for those with those allergies unless ingredients are swapped and tested.
My favorite aspect is how adaptable the topping is: some days I add a splash of lime zest for brightness or a scattering of toasted coconut on top for crunch. Family members often request these bars at gatherings because they cut and transport easily, and the pink topping sparks compliments every time. I’ve learned that cooling the cake completely before topping prevents the coconut from becoming wet and losing its snowy look.
Storage Tips
Store the bars in a single layer in an airtight container to preserve the snowy coconut appearance and prevent moisture buildup. If stacking is necessary, place parchment between layers. Refrigerate for up to 5 days; the texture will firm in the fridge but soften to ideal eating temperature within 30–45 minutes at room temperature. To freeze, cut into bars and flash-freeze on a tray, then transfer to a sealed freezer bag for up to 3 months. Thaw in the refrigerator overnight and bring to room temperature before serving. Avoid freezing after topping if you want to keep the coconut looking fresh and not soggy.

Ingredient Substitutions
If you need to swap ingredients, here are reliable options: replace the unsalted butter with equal-part coconut oil for a dairy-free edge (note texture changes slightly). Use gluten-free 1:1 flour blend to make the base gluten-free — expect small differences in crumb. Swap granulated sugar for coconut sugar for a deeper, caramel note, but color will darken. For a naturally pink tint, mix a pinch of beetroot powder into the topping rather than food coloring. You can also use sweetened flaked coconut in the topping if you prefer a chewier result — reduce powdered sugar slightly to balance sweetness.
Serving Suggestions
These bars are lovely alongside a cup of tea or coffee and pair well with simple accompaniments: lightly whipped cream, a scoop of vanilla ice cream, or fresh berries for brightness. For a dessert platter, alternate bars with shortbread cookies and fruit tarts for color contrast. Garnish individual servings with a sprinkle of toasted coconut or a few edible flowers for a party-ready presentation. They also work well as a treat in packed lunchboxes or as a sweet note on a brunch spread.
Cultural Background
The bars blend classic American traybake sensibilities with a tropical topping; coconut-based finishes nod to Caribbean and Pacific influences where coconut is a staple. The idea of a chocolate sheet cake topped with a textured coconut mixture is common in many home-baking traditions, often adapted to local tastes — whether that’s adding nuts, spices, or citrus. The pink hue is a modern playful twist on the nostalgic “snowball” or “coconut frosting” toppings popular in mid-century American baking.
Seasonal Adaptations
For spring and summer, brighten the topping with lemon or lime zest and serve chilled. In cooler months, fold a pinch of cinnamon or orange zest into the cake batter for warmth. For holiday variations try adding chopped dried cranberries to the topping or swap pink tint for red for a festive look. The bars adapt well to themed events: pastel shades for baby showers, or richer tones and toasted coconut for autumn gatherings.
Meal Prep Tips
Make the base a day ahead and keep it covered at room temperature; prepare the coconut mixture just before serving and spread it when the cake is fully cool. If you’re prepping for a week of snacks, cut the bars and store them in single-serve containers with parchment. For transport to events, place a layer of parchment on top of the bars inside the container to protect the topping, and keep them chilled until display time to maintain fresh texture.
These Pink Coconut Snowball Cake Bars are a small celebration in traybake form — easy to make, easy to share, and cheerful enough to brighten an ordinary day. Try them once and you’ll find yourself adapting the topping and flavor combinations over time.
Pro Tips
Cool the cake completely before spreading topping to prevent melting and sogginess.
Use an offset spatula for an even, smooth topping and cleaner edges when cutting.
If the topping is too runny, add a tablespoon more powdered sugar; if too stiff, add a teaspoon of milk at a time.
For neat slices, chill the topped cake for 20–30 minutes and clean the knife between cuts.
This nourishing pink coconut snowball cake bars recipe is sure to be a staple in your kitchen. Enjoy every moist, high protein slice — it is perfect for breakfast or as a wholesome snack any time.
FAQs about Recipes
Can I freeze the bars?
Yes — the base can be frozen uncut for up to 3 months; thaw fully before adding the coconut topping to avoid sogginess.
Can I make the topping dairy-free?
Use coconut milk for a stronger coconut flavor and to keep the topping dairy-free, and add the milk a teaspoon at a time until you reach spreadable consistency.
Tags
Pink Coconut Snowball Cake Bars
This Pink Coconut Snowball Cake Bars recipe makes perfectly juicy, tender, and flavorful steak every time! Serve with potatoes and a side salad for an unforgettable dinner in under 30 minutes.
Ingredients
Cake
Coconut Topping
Instructions
Preheat and prepare pan
Preheat oven to 350°F (175°C). Grease and line a 9x9-inch pan with parchment, leaving an overhang for easy removal.
Mix dry ingredients
Whisk together flour, sugar, cocoa powder, baking powder, and salt until evenly combined and free of lumps.
Mix wet ingredients
In a separate bowl, combine melted butter, eggs, and vanilla until smooth and slightly glossy.
Combine batter
Fold wet ingredients into the dry mix until just combined; avoid overmixing to keep the bars tender.
Bake the base
Pour batter into prepared pan and bake 20–25 minutes until a toothpick shows moist crumbs but no wet batter. Cool completely.
Make coconut topping
Stir shredded coconut with powdered sugar, then add milk 1 teaspoon at a time to reach a spreadable consistency. Add pink coloring if desired.
Assemble and cut
Spread topping evenly over cooled cake. Chill briefly for cleaner slices, then cut into 12 bars using a sharp knife.
Last Step: Please leave a rating and comment letting us know how you liked this recipe! This helps our business to thrive and continue providing free, high-quality recipes for you.
Nutrition
Did You Make This?
Leave a comment & rating below or tag
@easywhiskrecipes on social media!
Categories:
You might also like...

Instant Pot Creamy Chicken and Rice
A quick and comforting one pot dinner of tender chicken, creamy rice, and vegetables cooked together in the Instant Pot for an easy weeknight meal.

Cinnamon Roll Pancake Stacks
Fluffy pancakes swirled with a warm cinnamon filling and finished with a silky cream cheese glaze. Perfect for weekend brunches and cozy mornings.

Caramel Apple Cheesecake Bars
Buttery graham crust, creamy cheesecake, spiced Granny Smith apples, crunchy streusel, and a ribbon of homemade caramel — perfect dessert bars for gatherings.
Did You Make This?
Leave a comment & rating below or tag @easywhiskrecipes on social media!
Rate This Recipe
Share This Recipe
Enjoyed this recipe? Share it with friends and family, and don't forget to leave a review!
Comments (1)
This recipe looks amazing! Can't wait to try it.
Comments are stored locally in your browser. Server comments are displayed alongside your local comments.

Hi, I'm Sophie!
What's Popular

30-Minute Meals!
Join to receive our email series which contains a round-up of some of our quick and easy family favorite recipes.