
Oreo Truffle Balls with Pink Candy Coating

No-bake Oreo truffles dipped in a glossy pink candy coating—perfect for parties, gifts, and sweet tooth cravings.
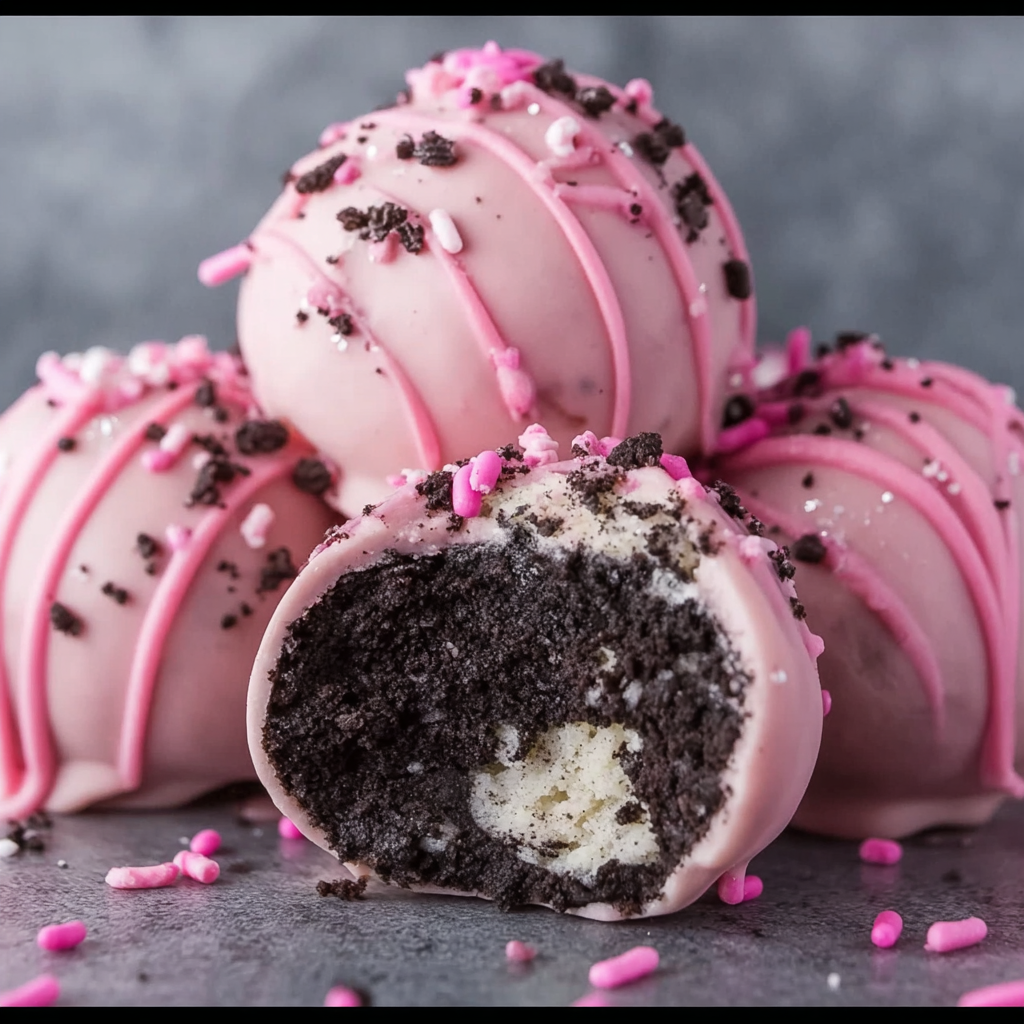
This batch of Oreo truffle balls with a pink candy coating is one of those simple, joyful treats that shows up whenever I need an instant crowd-pleaser. I first made them for a neighbor’s baby shower when I realized I had nothing fancy in the pantry beyond a package of sandwich cookies and a block of cream cheese. The result was unexpectedly elegant: rich, chocolaty centers wrapped in a smooth pink shell and finished with festive sprinkles. They disappeared from the table first, and someone asked if I’d ever consider selling them at local craft fairs.
What makes this version special is the contrast in textures and the playful color. The center is dense and creamy thanks to full-fat cream cheese binding finely ground cookies, then the exterior gives a crisp snap from the candy coating. These are no-bake, quick to assemble, and ideal for themed parties—Valentine’s Day, baby showers, bridal showers, or any time you want a tiny, showy confection. I’ll walk you through shopping tips, step-by-step technique, and ways to adapt the recipe so your truffles come out perfectly every time.
Why You'll Love This Recipe
- Fast no-bake finish: from start to fridge in about 30 minutes of active work, with short chilling steps—ideal for last-minute celebrations.
- Accessible ingredients: uses pantry staples like sandwich cookies and cream cheese; pink candy melts add color without food dye drama.
- Make-ahead friendly: centers can be formed a day ahead and dipped later, saving time on event days.
- Crowd-pleasing bite size: roughly 1-inch bites are portion-controlled and perfect for kids and parties.
- Customizable coating and decorations: swap candy melts for chocolate or white chocolate with coloring, and change sprinkles to match any theme.
- Minimal equipment and cleanup: no oven, just a food processor or rolling pin and a few bowls—great for compact kitchens.
In my household these truffles became a ritual after the first successful batch: I pack a dozen in little cellophane bags for neighbors and bring a platter to potlucks. My partner teases that they’re dangerous because they travel so well—people can’t resist grabbing a second. The candy coating makes them look special even though they’re effortless.
Ingredients
- Oreo cookies (1 package, 14.3 oz): Use original sandwich cookies for the classic chocolate-cream balance. You need about 36 cookies; pick a fresh package for crisp crumbs. For gluten-free, seek certified gluten-free sandwich cookies.
- Cream cheese (8 oz, softened): Full-fat cream cheese gives a rich, stable filling—room temperature makes mixing smooth. I prefer Philadelphia brand for consistent texture.
- Powdered sugar (1/4 cup, optional): Add only if you prefer a sweeter center; the cookies are already sweet so many skip this.
- Pink candy melts (2 cups): These provide the glossy colored shell. Brands like Wilton or Merckens melt reliably. Reserve 2 cups (about 12–14 oz by weight) for a uniform coating.
- Coconut oil or vegetable oil (1 tbsp): A teaspoon or tablespoon of neutral oil thins the melts for a silkier dip and helps the shell set smooth.
- Sprinkles (1/4 cup, pink/red/white): Optional, for festive decoration—choose jimmies or nonpareils depending on the look you want.
Instructions
Prepare the Oreo truffle centers: Place the Oreo cookies in a food processor and pulse until they form fine crumbs. If you don’t have a processor, put cookies in a heavy-duty zip-top bag and crush with a rolling pin until pulverized. Transfer crumbs to a large bowl and add the softened cream cheese; mix with a spatula or clean hands until fully combined into a uniform, slightly sticky dough—avoid overworking which warms the mixture. If you like it sweeter, fold in 1/4 cup powdered sugar. The texture should hold together when rolled into balls; if too dry, add a teaspoon of softened cream cheese, if too wet add a tablespoon of crumbs. Shape and chill: Line a baking sheet with parchment. Scoop approximately 1 tablespoon of the mixture and roll into 1-inch balls (about the size of a large marble). Place them on the prepared sheet, spaced slightly apart. Freeze for 20–30 minutes until firm—this keeps centers intact when dipped. If you prefer to refrigerate, chill at least 45 minutes but freezing speeds the process and keeps hands clean during dipping. Melt the candy coating: In a microwave-safe bowl, combine the pink candy melts with 1 tablespoon coconut or vegetable oil. Microwave in 25–30 second bursts, stirring between each burst until smooth. Keep the chocolate warm but not hot; overheating can make the coating thick and dull. If the melts thicken as you work, a few seconds in the microwave will re-liquefy them—stir thoroughly to maintain gloss. Dip each ball: Remove centers from the freezer. Use a fork, dipping tool, or chocolate dipping spoon to lower a ball into the melted coating, roll to cover completely, then lift and let excess drip back into the bowl. Tap the fork lightly against the bowl to encourage drips to fall. Place the coated truffle back on parchment and immediately add sprinkles while the coating is wet. Set the coating: After dipping, place the sheet in the refrigerator for 10–15 minutes to allow shells to harden. Once firm, transfer truffles to an airtight container. Store chilled for up to a week or freeze for longer keeping. Bring to room temperature 10–15 minutes before serving so the centers soften slightly.
You Must Know
- These bites are high in fat and sugar—one small ball is roughly 100–140 calories depending on coating thickness; they’re a treat rather than a daily snack.
- Freeze well for up to 3 months; thaw in the refrigerator or on the counter for 10–15 minutes before serving.
- Use full-fat cream cheese for the best texture; low-fat versions can make centers grainy and less stable.
- Coating sets fastest in the refrigerator; avoid humid conditions which can cause bloom or tackiness on the surface.
I love that these truffles combine the nostalgia of sandwich cookies with a grown-up presentation. When I’ve brought trays to school events, teachers always ask for the recipe, and once a friend replicated them in mini cupcake liners for a bridal shower—another testament to their adaptability and appeal.

Storage Tips
Store truffles in an airtight container in the refrigerator for up to 7 days. Layer sheets of parchment between rows to prevent sticking. For longer storage, freeze in a single layer on a baking sheet, then transfer frozen truffles to a freezer bag for up to 3 months. To serve from frozen, move to the refrigerator for 30–60 minutes, then bring to room temperature for 10–15 minutes—this prevents condensation that can dull the candy shell.
Ingredient Substitutions
If you prefer a dairy-free option, use a vegan cream cheese substitute and double-check that your sandwich cookies are dairy-free; for the coating pick vegan candy melts or tempered dairy-free chocolate. To reduce sugar, omit the powdered sugar and use a darker cookie like chocolate wafers (if available) to balance sweetness. You can also flavor the centers with 1/2 teaspoon vanilla extract, peppermint extract for a holiday version, or 1 tablespoon melted peanut butter folded into the dough for a nutty twist.
Serving Suggestions
Arrange truffles on a pretty platter with doilies, place in mini paper liners, or present them in cellophane bags tied with ribbon for gifts. They pair nicely with black coffee or a dessert wine like Moscato. For a brunch buffet, offer alongside fruit and light pastries so guests have a balanced selection. Garnish with a tiny edible gold leaf for an elegant moment at special events.
Cultural Background
These bite-size sweets are a modern American adaptation of the classic European truffle—rather than ganache centers, they use cookie crumbs and cream cheese as a quick shortcut. The technique of coating small confections in tempered or melted confectionery coating is common in confectionery shops worldwide; this no-bake spin became wildly popular because it’s approachable and requires no specialized tempering skills.
Seasonal Adaptations
Change the coating color and sprinkles to match holidays—red or green for Christmas, orange and black for Halloween, pastel colors for spring. Add a splash of citrus zest in the center during summer months for brightness, or mix in pumpkin spice in the fall. For Valentine’s Day, use rose-flavored candy melts or add a drop of raspberry extract to the melted coating for an aromatic finish.
Meal Prep Tips
Make the centers up to 48 hours ahead and keep chilled; dip the day you plan to serve for the freshest look. For large batches, work in small trays of 12–15 balls so the coating stays warm and fluid. Rewarm the candy melts in 10–15 second bursts as needed—stir thoroughly to avoid scorching. Use silicone molds if you want perfectly shaped domes without rolling by hand.
These truffles are a blend of nostalgia, simplicity, and versatility—perfect for home cooks who want a high-impact, low-effort treat. Enjoy sharing them, tweaking flavors, and seeing how a small pink bite can brighten any gathering.
Pro Tips
Use room-temperature full-fat cream cheese for smooth, stable centers; cold cream cheese makes lumps.
Freeze shaped centers for at least 20 minutes so they hold together during dipping.
Thin candy melts with a small amount of coconut or vegetable oil for a glossy, smooth coating.
This nourishing oreo truffle balls with pink candy coating recipe is sure to be a staple in your kitchen. Enjoy every moist, high protein slice — it is perfect for breakfast or as a wholesome snack any time.
FAQs about Recipes
Can I prepare these ahead of time?
Yes. You can make the centers a day or two ahead and keep them chilled in an airtight container, then dip just before serving.
How do I freeze and thaw them?
Freeze on a baking sheet first, then transfer to a freezer bag. Thaw in the refrigerator before serving to avoid condensation on the candy shell.
Tags
Oreo Truffle Balls with Pink Candy Coating
This Oreo Truffle Balls with Pink Candy Coating recipe makes perfectly juicy, tender, and flavorful steak every time! Serve with potatoes and a side salad for an unforgettable dinner in under 30 minutes.
Ingredients
Truffle Filling
Coating
Decoration
Instructions
Make the crumbs and mix
Pulse the Oreo cookies in a food processor until fine crumbs form. Combine crumbs with softened cream cheese in a bowl and mix until a uniform, slightly sticky dough develops. Add powdered sugar if desired for extra sweetness.
Shape and chill
Roll the mixture into 1-inch balls and place on a parchment-lined baking sheet. Freeze for 20–30 minutes, or refrigerate for up to 45 minutes until firm.
Melt the coating
Combine pink candy melts and coconut oil in a microwave-safe bowl. Heat in 25–30 second bursts, stirring between, until smooth and glossy. Keep warm but avoid overheating.
Dip and decorate
Dip each frozen ball into the melted coating using a fork or dipping tool, tap off excess, and place back on parchment. Add sprinkles while coating is wet.
Set and store
Refrigerate the tray for 10–15 minutes until coating is firm. Store in an airtight container in the refrigerator for up to 1 week or freeze for longer storage.
Last Step: Please leave a rating and comment letting us know how you liked this recipe! This helps our business to thrive and continue providing free, high-quality recipes for you.
Nutrition
Did You Make This?
Leave a comment & rating below or tag
@easywhiskrecipes on social media!
Categories:
You might also like...

Instant Pot Creamy Chicken and Rice
A quick and comforting one pot dinner of tender chicken, creamy rice, and vegetables cooked together in the Instant Pot for an easy weeknight meal.

Cinnamon Roll Pancake Stacks
Fluffy pancakes swirled with a warm cinnamon filling and finished with a silky cream cheese glaze. Perfect for weekend brunches and cozy mornings.

Caramel Apple Cheesecake Bars
Buttery graham crust, creamy cheesecake, spiced Granny Smith apples, crunchy streusel, and a ribbon of homemade caramel — perfect dessert bars for gatherings.
Did You Make This?
Leave a comment & rating below or tag @easywhiskrecipes on social media!
Rate This Recipe
Share This Recipe
Enjoyed this recipe? Share it with friends and family, and don't forget to leave a review!
Comments (1)
This recipe looks amazing! Can't wait to try it.
Comments are stored locally in your browser. Server comments are displayed alongside your local comments.

Hi, I'm Sophie!
What's Popular

30-Minute Meals!
Join to receive our email series which contains a round-up of some of our quick and easy family favorite recipes.