
Onion Ring Chips

Crispy, golden onion ring chips with a flaky panko crust and a tender sweet interior — an easy snack or side that fries up in minutes and disappears fast.

This recipe for Onion Ring Chips has been my go-to crunchy snack since the first time I tested it on a rainy Saturday afternoon. I remember pulling a bag of panko from the pantry and a pair of oversized sweet onions from the farmers' market, thinking I'd just make a little treat. The result was unexpectedly addictive: a light, crackly exterior that gave way to a soft, caramelized onion inside. Friends who visited that weekend remarked that these tasted like a deli-style indulgence, but were somehow lighter and more delicate than classic batter-dipped rings.
I discovered this particular method while aiming to use only pantry staples and a single bowl of buttermilk for adhesion — no egg wash or complex batter. The technique relies on a two-step dredge and a panko finish, which creates the characteristic chips: thin, crisp, and ideal for dunking. Over the years I've tweaked timing, oil temperature, and seasoning balance to make the coating cling reliably and to avoid soggy results. Whether you serve these as an appetizer for guests or a comfort-food side at a weeknight dinner, the contrast of textures and the straightforward ingredients make this a repeatable favorite in my kitchen.
Why You'll Love This Recipe
- Quick to prepare: from slicing to frying in about 30 minutes — great for last-minute guests or snack cravings.
- Uses pantry-friendly staples: all-purpose flour, panko, basic spices and buttermilk — no special ingredients required.
- Light, extra-crispy finish: the two-step dredge plus panko creates an airy, shattering crust that stays crisp longer than standard batter.
- Make-ahead friendly: you can prep rings up to the panko step and chill for 1–2 hours before frying for convenient timing.
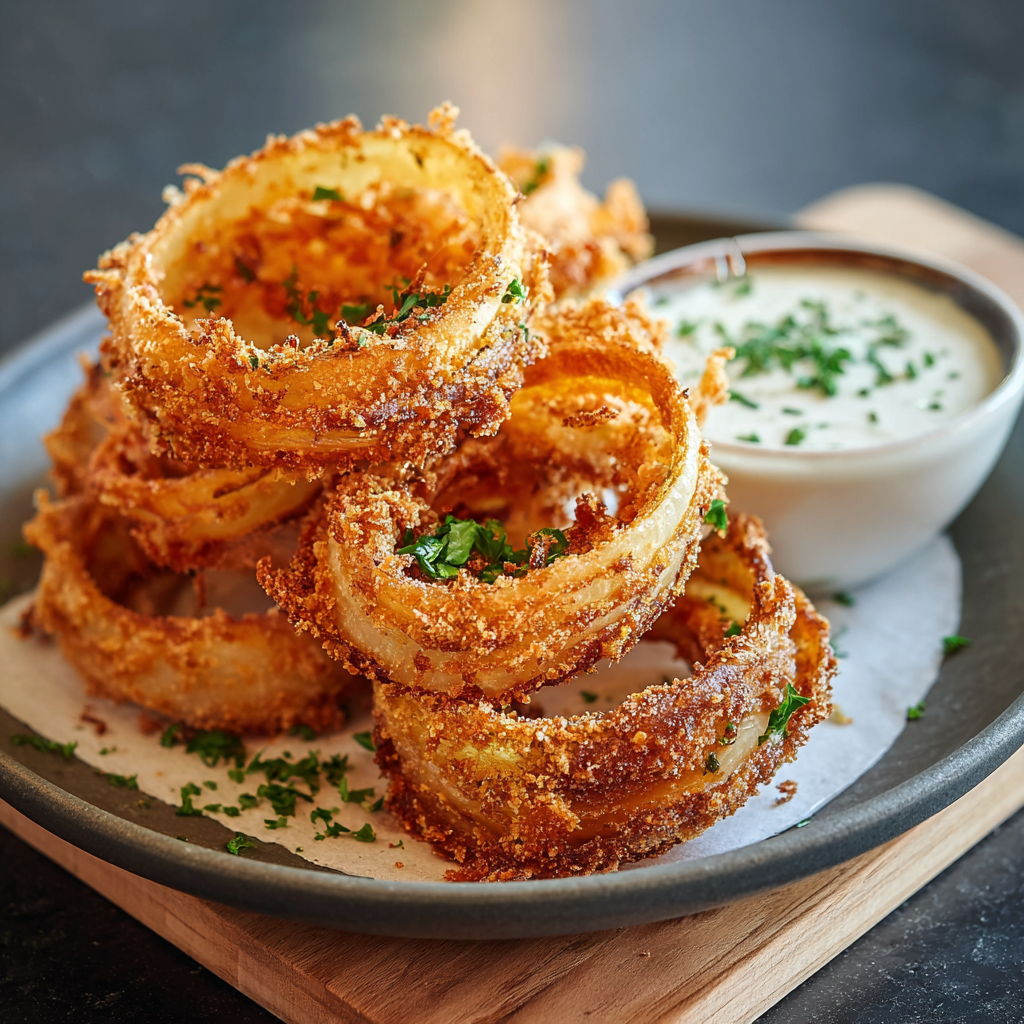
- Crowd-pleasing dipping options: pairs beautifully with spicy mayo, classic ketchup, or a tangy yogurt-dill dip for variety.
- Adaptable salt and spice levels: easily adjust paprika or garlic powder to suit mild or smoky preferences.
I first served these with a smoky chipotle-ketchup and watched an entire bowl disappear in under ten minutes. Family members kept commenting on the lightness of the crust — you get that satisfying crunch without feeling weighed down. It’s the kind of recipe that becomes part of regular rotation because it’s both reliable and impressive without fuss.
Ingredients
- Onions (Main): 2 large onions, peeled and sliced into 1/4-inch rings. Choose sweet or Spanish onions for a mellow sweetness; yellow onions will give a slightly sharper flavor. Look for firm bulbs without soft spots — thicker rings hold together better during frying.
- Seasoned flour (Dredge): 1 cup all-purpose flour, 1 teaspoon garlic powder, 1 teaspoon paprika, 1/2 teaspoon salt, 1/2 teaspoon black pepper. This simple blend seasons the interior and creates a dry surface for the buttermilk to cling to, ensuring even coating.
- Buttermilk (Soak & Coating): 1 cup buttermilk. It tenderizes the onion slightly and acts as the sticky medium between flour and panko — full-fat buttermilk gives the best adhesion and flavor.
- Panko breadcrumbs (Soak & Coating): 2 cups panko. Use Japanese-style panko for extra flake and airiness; traditional breadcrumbs will be denser and yield a heavier crust.
- Vegetable oil (For frying): About 4 cups (enough to reach ~2 inches deep in your frying pan). Neutral oil like canola, peanut, or sunflower is best — stable at high heat and won’t clash with the onion’s sweetness.
Instructions
Slice and dry onions: Peel 2 large onions and slice into 1/4-inch rings. Separate rings gently and pat them completely dry with paper towels. Removing surface moisture is crucial — excess water prevents the flour and buttermilk from adhering properly and leads to soggy spots. If rings are very wet, let them air-dry on a rack for 10 minutes. Prepare dry dredge: In a shallow bowl, whisk 1 cup all-purpose flour with 1 teaspoon garlic powder, 1 teaspoon paprika, 1/2 teaspoon salt, and 1/2 teaspoon black pepper. Sifting is optional but helps prevent lumps and ensures even distribution of the spices. Keep this bowl near your buttermilk station for an efficient assembly line. Buttermilk soak: Place the rings in 1 cup buttermilk and let them sit for about 5 minutes. This short soak tenderizes the onion slightly and primes the surface for a second flour contact. Too long in buttermilk can make very thin rings fall apart, so keep the time brief. First dredge: Shake off excess buttermilk, then dredge each ring in the seasoned flour, tapping gently to remove clumps. A light, even layer gives structure and helps the final panko coat adhere. Place floured rings on a wire rack to keep air circulating and prevent the bottom from becoming soggy. Panko coating: Quickly dip the floured rings back into buttermilk, then press both sides into 2 cups of panko breadcrumbs. Use your hands to press panko into the surface so it adheres well — the goal is an even, flaky crust without heavy clumps. Return to the rack and let rest 5 minutes so crumbs settle. Heat oil: Heat vegetable oil to 350°F (175°C) in a heavy skillet or Dutch oven to a depth of roughly 2 inches. Use a thermometer for accuracy — oil that’s too cool absorbs excess grease; oil that’s too hot browns the crust before the onion is warmed through. Fry in batches: Fry rings in a single layer for 2 to 3 minutes per side until golden and crisp. Avoid overcrowding the pan; fry in small batches so the oil temperature recovers quickly. Use a slotted spoon to transfer rings to a wire rack set over a sheet pan to drain. Season and serve: While still hot, sprinkle the rings with a pinch of salt. Serve immediately with dipping sauces like spicy mayo, ketchup, or a cool yogurt-dill. Serving hot preserves the contrast between crunchy crust and tender interior.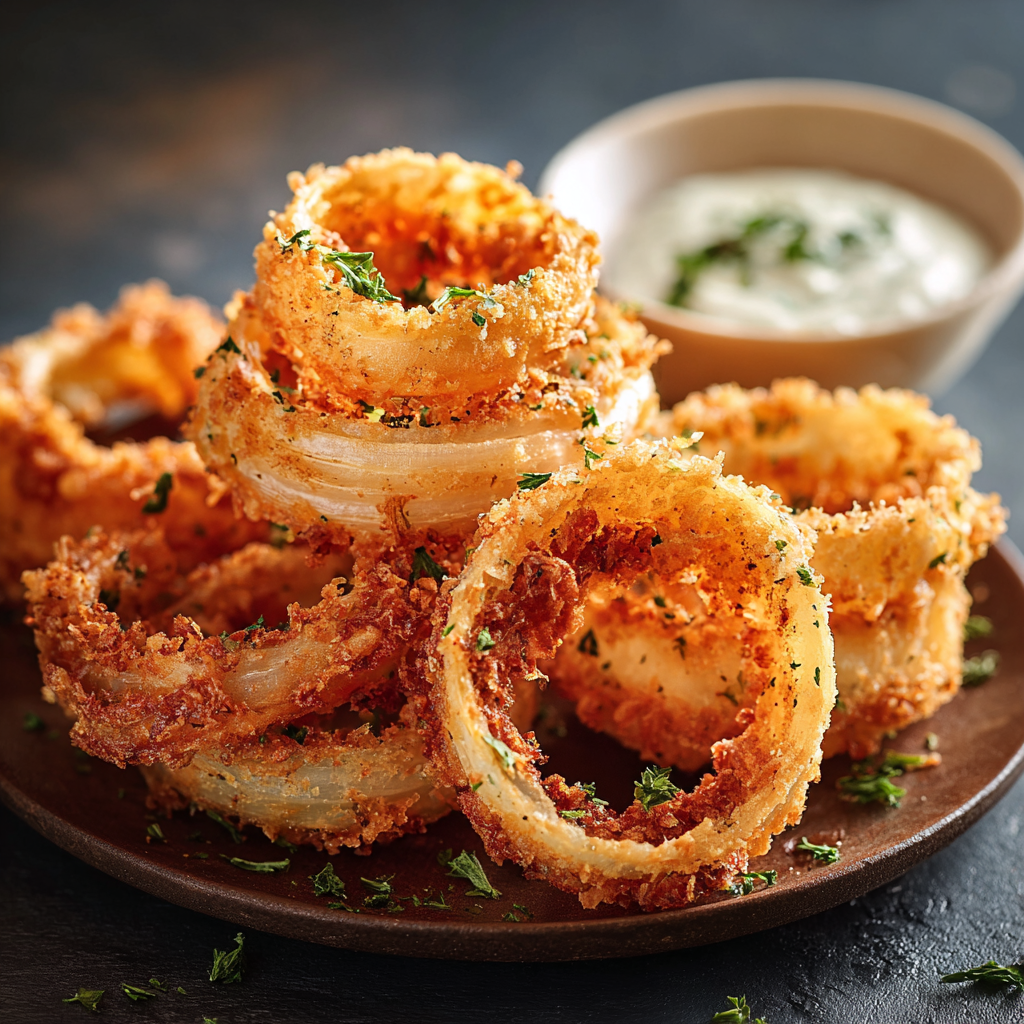
You Must Know
- These will stay crisp for up to 30 minutes at room temperature on a wire rack; storing them airtight makes them lose crunch quickly.
- Frying temperature matters: keep oil at about 350°F (175°C) for an even golden color without over-absorbing oil.
- Buttermilk is key for adhesion and a slight tang — swap with thinned plain yogurt only if necessary (1/2 cup yogurt + 1/2 cup milk).
- Panko produces a lighter, flakier crust than standard breadcrumbs; use fresh panko for best results.
- These rings are not suitable for freezing after frying — texture degrades; freeze only raw, coated rings briefly if needed.
I love how this method turns ordinary onions into something party-worthy. Once, for a backyard barbecue, I prepped a double batch and watched guests debate whether these belonged on the appetizer table or next to burgers. The crunchy panko and warm, sweet onion combination consistently draws compliments; it’s a small change that makes a big difference in flavor and texture.
Storage Tips
For the best texture, keep finished rings on a wire rack at room temperature and serve within 20–30 minutes. To refrigerate leftovers, cool completely, then store in an airtight container lined with paper towels to absorb excess oil; reheat in a 400°F oven or air fryer for 3–5 minutes to crisp them back up. Don’t stack hot rings directly on top of each other or in a closed container while warm — steam will soften the crust. If you need to prepare in advance, coat the rings up to the panko step and refrigerate on a tray for up to 2 hours; fry just before serving for near-fresh results.
Ingredient Substitutions
If you’re out of buttermilk, make a quick substitute with 1 cup milk mixed with 1 tablespoon white vinegar or lemon juice, let it sit 5 minutes. For gluten-free needs, use a certified gluten-free all-purpose flour and gluten-free panko blend — note the texture will be slightly different but will still crisp well. Swap panko for crushed cornflakes for a slightly sweeter, crunchier finish; adjust seasoning because cornflakes can be saltier. To reduce fat, shallow-fry in less oil or use an air fryer at 375°F for 6–8 minutes, flipping halfway, though the air-fried rings will be less decadent than deep-fried versions.
Serving Suggestions
These chips are fantastic with a range of dips: spicy sriracha mayo, smoky chipotle ketchup, tangy buttermilk ranch, or a lemony herbed yogurt. Serve alongside burgers, hot dogs, or a grilled sandwich for a classic pairing. For a shareable appetizer, present them in a large bowl with small ramekins of three different dips for variety. Garnish with flaky sea salt and chopped chives, or a light dusting of smoked paprika for color and a hint of warmth.
Cultural Background
Crispy fried onions are beloved in many food traditions — from British batter-dipped rings to American diner-style sides. The panko finish borrows from Japanese breadcrumb techniques that emphasize air and flake, creating a different mouthfeel than traditional Western crumbs. Combining these approaches yields a hybrid that delivers the best of both worlds: the indulgence of classic fried sides with the lightness and texture that panko provides. This cross-cultural twist is part of why the recipe feels both familiar and refreshingly new to many eaters.
Seasonal Adaptations
In summer, use sweet Vidalia onions for a milder, sweeter profile that pairs nicely with grilled meats. In cooler months, choose larger yellow onions and add a pinch of ground cumin or smoked paprika to the flour for deeper, warming notes. For holiday variations, add finely chopped rosemary to the panko or mix a little grated Parmesan into the breadcrumb coating for a savory, festive touch. These small tweaks let you adapt the basic technique to match seasonal produce and menu themes.
Meal Prep Tips
To streamline, slice onions and set up three stations: flour mix, buttermilk, and panko. Coat rings and place on a baking sheet with a rack, then refrigerate uncovered for up to 2 hours—this firms the coating and makes frying faster. Reheat in a 400°F oven or air fryer to restore crispness. For larger gatherings, fry in multiple small batches and keep finished rings on a warm oven set to 200°F on a rack; this preserves texture without overcooking. Pack cooled rings in paper-lined containers for short transports to picnics or potlucks.
These Onion Ring Chips are a simple, dependable way to elevate onions into a crunchy, shareable treat. Whether you’re feeding friends or adding a crunchy side to dinner, the technique is forgiving and rewarding — and once you try it, you’ll find yourself slicing onions for an easy snack again and again.
Pro Tips
Dry rings thoroughly before coating to ensure the panko adheres and stays crisp.
Maintain oil temperature at about 350°F (175°C) to prevent greasy rings and achieve a golden color.
Use a wire rack to drain fried rings so they don’t steam and lose crunch.
If making ahead, coat rings through the panko step and refrigerate for up to 2 hours before frying.
This nourishing onion ring chips recipe is sure to be a staple in your kitchen. Enjoy every moist, high protein slice — it is perfect for breakfast or as a wholesome snack any time.
Tags
Onion Ring Chips
This Onion Ring Chips recipe makes perfectly juicy, tender, and flavorful steak every time! Serve with potatoes and a side salad for an unforgettable dinner in under 30 minutes.
Ingredients
Main
Dredge
Soak and Coating
For Frying
Instructions
Slice and dry onions
Peel and slice 2 large onions into 1/4-inch rings. Separate rings and pat dry thoroughly with paper towels, or air-dry on a rack for 10 minutes to remove surface moisture.
Prepare dry dredge
Combine 1 cup all-purpose flour, 1 teaspoon garlic powder, 1 teaspoon paprika, 1/2 teaspoon salt and 1/2 teaspoon black pepper in a shallow bowl and whisk until evenly mixed.
Buttermilk soak
Place rings into 1 cup buttermilk for about 5 minutes to tenderize and help the coating adhere without over-soaking fragile rings.
First dredge
Shake off excess buttermilk, then dredge each ring in the seasoned flour to create a thin, even layer. Set on a wire rack to rest briefly.
Panko coating
Dip the floured rings back into buttermilk and press into 2 cups panko breadcrumbs, making sure both sides are well coated. Let rest on rack for 5 minutes.
Heat oil
Heat vegetable oil to 350°F (175°C) in a heavy skillet or Dutch oven to a depth of about 2 inches. Use a thermometer for consistent results.
Fry in batches
Fry rings in a single layer for 2–3 minutes per side until golden and crisp, avoiding overcrowding. Transfer to a wire rack to drain.
Season and serve
Sprinkle with a pinch of salt while hot and serve immediately with desired dips. Reheat in an oven or air fryer to restore crispness if necessary.
Last Step: Please leave a rating and comment letting us know how you liked this recipe! This helps our business to thrive and continue providing free, high-quality recipes for you.
Nutrition
Did You Make This?
Leave a comment & rating below or tag
@easywhiskrecipes on social media!
Categories:
You might also like...

Instant Pot Creamy Chicken and Rice
A quick and comforting one pot dinner of tender chicken, creamy rice, and vegetables cooked together in the Instant Pot for an easy weeknight meal.

Cinnamon Roll Pancake Stacks
Fluffy pancakes swirled with a warm cinnamon filling and finished with a silky cream cheese glaze. Perfect for weekend brunches and cozy mornings.

Caramel Apple Cheesecake Bars
Buttery graham crust, creamy cheesecake, spiced Granny Smith apples, crunchy streusel, and a ribbon of homemade caramel — perfect dessert bars for gatherings.
Did You Make This?
Leave a comment & rating below or tag @easywhiskrecipes on social media!
Rate This Recipe
Share This Recipe
Enjoyed this recipe? Share it with friends and family, and don't forget to leave a review!
Comments (1)
This recipe looks amazing! Can't wait to try it.
Comments are stored locally in your browser. Server comments are displayed alongside your local comments.

Hi, I'm Sophie!
What's Popular

30-Minute Meals!
Join to receive our email series which contains a round-up of some of our quick and easy family favorite recipes.