
>>

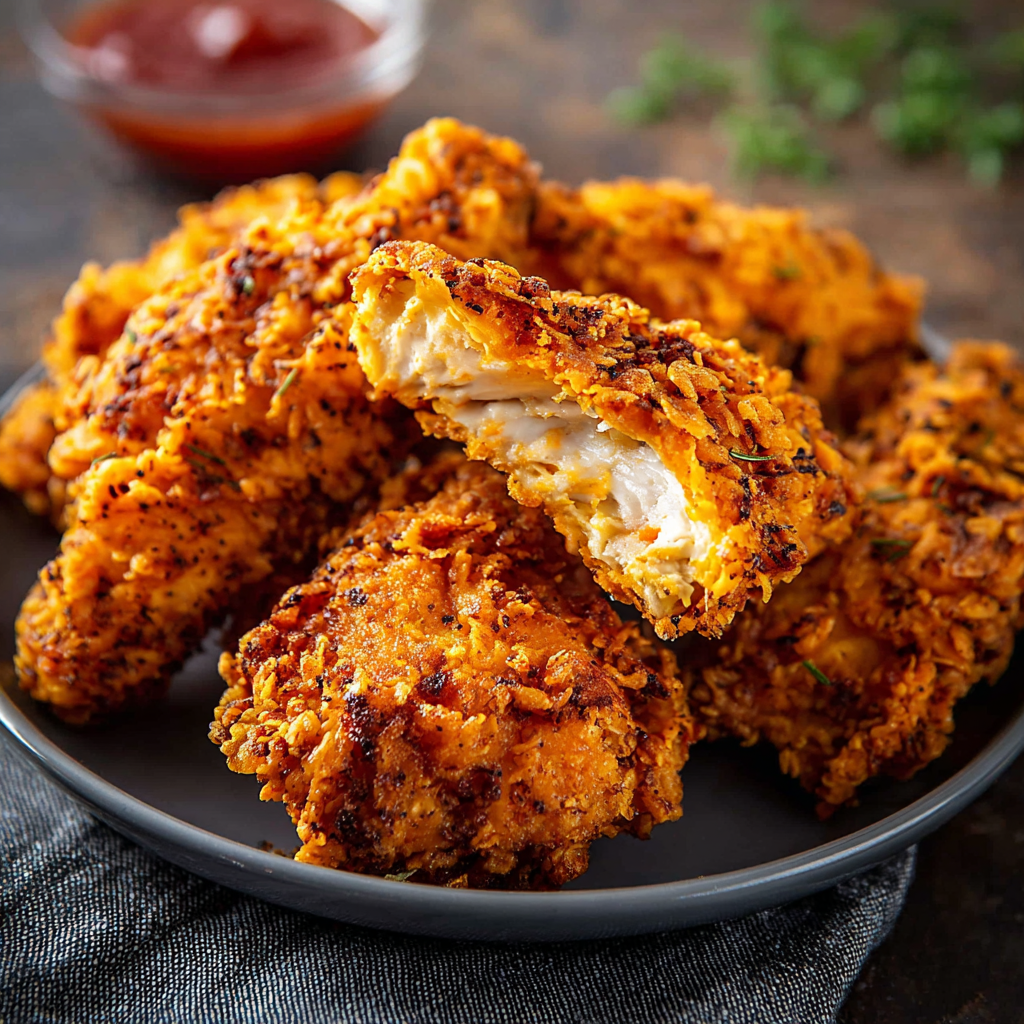
A faithful, crispy home-style fried chicken with a seasoned double-dredge and buttermilk soak — golden, juicy, and perfect for family dinners.
This KFC-style crispy chicken has been my go-to when I want that nostalgic, crunchy comfort food that everyone reaches for first. I discovered this approach on a rainy weekend while trying to replicate the golden pieces my kids always begged for at the drive-through. After experimenting with a handful of spice adjustments and the double-dredge technique, I landed on a balance of heat, herbaceous notes, and a crisp crust that stays satisfyingly crunchy even after resting. The result: a plate of chicken that brings people to the table, sparks conversation, and disappears quickly.
What makes this version special is the marriage of a tangy buttermilk soak with a seasoned flour that includes both classic and subtle spices — white pepper for gentle heat, a pinch of cayenne for a background kick, and herbs like thyme and basil to deepen the flavor. The double-dredge method (flour, buttermilk, flour) creates a thick, textured coating that fries up into an irresistible crust while sealing in the juices. Over time I've learned a few tricks — use a thermometer, drain on a wire rack, and give the chicken a short rest — that move this from good to exceptional every time.
When I served this at a backyard picnic, even the neighbor who declared herself a "fussy fried chicken critic" asked for the recipe. My kids love the crunchy edges and the slightly herby finish; my partner appreciates the crisp skin and the steady, familiar seasoning that isn't overpowering. It’s become our reliable treat for game nights and rainy-weekend comfort meals.
My favorite thing about this preparation is the way the first bite offers a clean snap — the crust breaks with a satisfying sound and gives way to steaming, juicy meat. At holiday gatherings this is the plate everyone reaches for first; watching the quiet contentment as someone bites into a perfectly fried piece never gets old.
For short-term storage, cool pieces to room temperature and refrigerate in a shallow airtight container layered between parchment to protect the crust for up to 3 days. To freeze, place dredged but uncooked pieces on a baking sheet in a single layer and freeze until solid (2–3 hours), then transfer to freezer bags labeled with date; they keep up to 3 months. Reheat refrigerated pieces in a preheated 400°F oven on a wire rack for 10–12 minutes to restore crispness. Avoid microwaving; it softens the coating and makes the meat rubbery.
If you prefer a lighter crust, replace 1 cup of flour with 1 cup of cornstarch or rice flour to increase crispness. For dairy-free options, use a plant-based buttermilk (1 cup unsweetened soy milk plus 1 tablespoon vinegar) and omit eggs or replace them with a flax egg (1 tablespoon ground flax mixed with 3 tablespoons water each egg). For gluten-free, use a certified gluten-free flour blend with xanthan gum and check that your spices are gluten-free. Swap paprika for smoked paprika for a deeper, smoky profile.
Serve with classic sides: mashed potatoes and gravy, coleslaw, or buttery corn on the cob for a nostalgic meal. For a modern plate, pair with a crisp green salad, pickled cucumbers, and lemon wedges to cut through the richness. Garnish with chopped parsley and a dusting of flaky sea salt for an elevated look. This also works well in sandwiches — place a piece on a toasted brioche bun with pickles and a smear of mayonnaise.
Fried chicken has deep roots in American cuisine, merging West African frying techniques with Southern traditions and European seasonings. The idea of a seasoned, double-coated piece producing a deep, golden crust is a hallmark of Southern-style frying, which evolved into many regional variants. Chains popularized the crispy, uniformly seasoned pieces, but the essence remains a celebration of texture and technique: acid in the soak, the right frying temperature, and a proper rest.
In summer, lighten the plate with chilled corn salad and a bright herb vinaigrette; swap dried basil for fresh chopped basil folded into a warm slaw. In cooler months, pair with braised greens, roasted root vegetables, or a hearty gravy. For holiday twists, add a teaspoon of ground allspice or a pinch of nutmeg to the flour for a warm, aromatic edge that pairs well with winter sides.
For weeknight convenience, marinate the chicken the night before and keep the dredged pieces on a parchment-lined tray in the fridge. Fry just before serving to retain maximum crunch. If you need to serve large groups, fry in batches and keep finished pieces in a low oven (200°F) on a wire rack; this prevents steaming and keeps skin crisp. Use a digital thermometer to monitor oil and internal temps for consistent results.
Bring this into your kitchen as a reliable, crowd-pleasing main that’s easy to scale, forgiving with timing, and adaptable to many tastes. Share it, tweak it, and make it the version your family remembers.
Use a thermometer to keep oil at 350°F to ensure even cooking and prevent greasy crusts.
Drain fried pieces on a wire rack instead of paper towels to keep the bottom crisp.
For extra-crisp coating, press the second flour layer firmly onto the wet chicken before frying.
If coating seems heavy, shake off excess flour; too much loose flour can burn in the oil.
Allow pieces to rest 5–10 minutes after frying so juices redistribute for a juicier bite.
This nourishing kfc-style crispy chicken recipe is sure to be a staple in your kitchen. Enjoy every moist, high protein slice — it is perfect for breakfast or as a wholesome snack any time.
Yes — marinate at least 2 hours for best tenderness; overnight marinating intensifies flavor and tenderness further.
Heat oil to 350°F and maintain that temperature; adjusting batch size helps keep oil stable.
This KFC-Style Crispy Chicken recipe makes perfectly juicy, tender, and flavorful steak every time! Serve with potatoes and a side salad for an unforgettable dinner in under 30 minutes.
Whisk 1 cup buttermilk with 2 beaten eggs in a large bowl, add chicken pieces, cover, and refrigerate for at least 2 hours or up to overnight to tenderize and flavor the meat.
Combine 2 cups flour with 2 teaspoons salt, 1 1/2 teaspoons black pepper, 1 tablespoon paprika, 1 teaspoon each garlic powder, onion powder, thyme, basil, plus 1/2 teaspoon white pepper and 1/2 teaspoon cayenne; mix thoroughly.
Dredge each marinated piece in the seasoned flour, shake off excess, dip back into the buttermilk mixture, and dredge again in the flour to build a thick coating for maximum crunch.
In a deep pot or Dutch oven, heat oil to 350°F (175°C) using a thermometer and maintain this temperature while frying in small batches.
Fry pieces 6–8 minutes per side until deep golden and internal temperature reaches 165–175°F near the bone; drain on a wire rack to avoid soggy bottoms.
Allow chicken to rest 5–10 minutes so juices redistribute; serve warm with sides or keep in a 200°F oven to hold for up to 20 minutes.
Last Step: Please leave a rating and comment letting us know how you liked this recipe! This helps our business to thrive and continue providing free, high-quality recipes for you.
Leave a comment & rating below or tag
@easywhiskrecipes on social media!

A quick and comforting one pot dinner of tender chicken, creamy rice, and vegetables cooked together in the Instant Pot for an easy weeknight meal.

Fluffy pancakes swirled with a warm cinnamon filling and finished with a silky cream cheese glaze. Perfect for weekend brunches and cozy mornings.

Buttery graham crust, creamy cheesecake, spiced Granny Smith apples, crunchy streusel, and a ribbon of homemade caramel — perfect dessert bars for gatherings.
Leave a comment & rating below or tag @easywhiskrecipes on social media!
Enjoyed this recipe? Share it with friends and family, and don't forget to leave a review!
This recipe looks amazing! Can't wait to try it.
Comments are stored locally in your browser. Server comments are displayed alongside your local comments.

Join to receive our email series which contains a round-up of some of our quick and easy family favorite recipes.
