
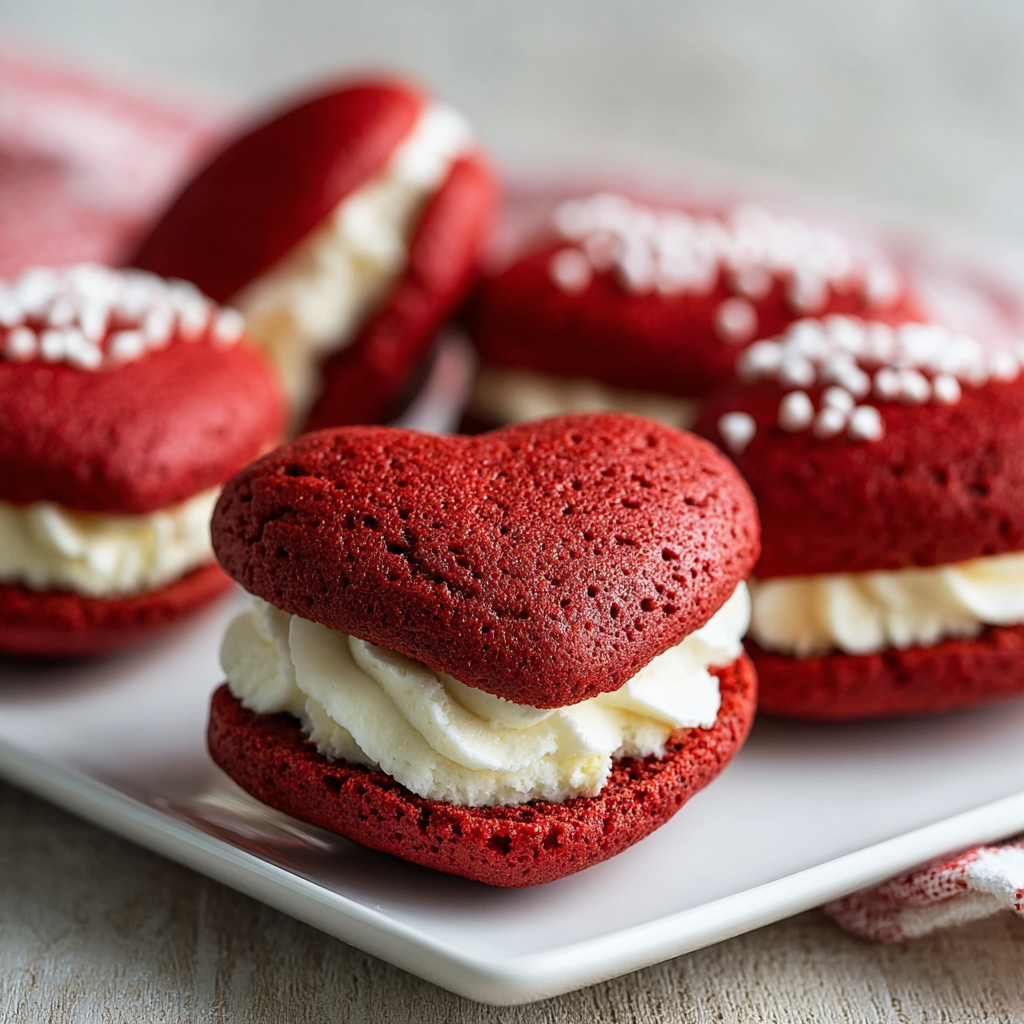
Heart-Shaped Red Velvet Whoopie Pies

Soft, tender heart-shaped red velvet cakes sandwiched with a silky cream cheese filling. Perfect for celebrations, gifts, and cozy afternoons.
This recipe for heart-shaped red velvet whoopie pies has lived in my kitchen for years and shows up whenever I want to make someone feel special. I first experimented with the batter one February while planning a low-stress dessert for a small Valentine gathering. The cakes came out tender and slightly cakey, the red color bright but not overpowering, and the cream cheese filling balanced the sweetness with a gentle tang. What began as a tests-and-tweaks session quickly became a go-to for celebrations because the little heart shapes make every bite feel like a gift.
I remember piping the first batch while my son watched from the kitchen island, declaring them "the best cookies ever" before he even tried one. The texture is the real reason these are so addictive: the cakes are soft and springy, with a cocoa whisper that complements the buttermilk tang. The filling is rich but light enough to let the cakes shine. This combination has been served on birthdays, anniversaries, and quiet Sunday afternoons, and it is one of those recipes that guests ask for whenever they see the familiar heart shape in the lunchbox.
Why You'll Love This Recipe
- They are quick to make and practical for small gatherings; the batter comes together in a single mixing sequence and bakes in 10 to 12 minutes.
- The ingredients are pantry-friendly and easy to source: all-purpose flour, cocoa, buttermilk, cream cheese, and common baking staples.
- Heart shapes make these perfect for holidays, gifts, and thoughtful treats without requiring special molds or cutters.
- Make-ahead friendly: the cakes and filling store well refrigerated and freeze beautifully for up to three months.
- Kid friendly to assemble: piping the batter and filling turns this into a fun family activity that yields professional-looking results.
I always keep a jar of high quality gel food coloring and a small piping bag in my baking drawer for this recipe. Over the years I learned that using room temperature ingredients gives the best rise and the smoothest filling. My family tends to fight over the first one out of the fridge, which is a reliable sign that the balance of sweet, tangy, and cocoa is spot on.
Ingredients
- All-purpose flour: Use 2 cups of a reliable brand such as King Arthur or Pillsbury for even structure. Spoon into the measuring cup and level off for accuracy to keep the cakes tender but not dense.
- Granulated sugar: 1 cup; provides sweetness and helps create a light crumb. Caster sugar works equally well if you prefer a slightly finer texture.
- Buttermilk: 1 cup at room temperature; key for tang and moisture. If you do not have cultured buttermilk, whisk 1 tablespoon vinegar into a cup of milk and let sit for 10 minutes.
- Baking soda: 1 teaspoon; activates with the vinegar and buttermilk to give a tender lift. Freshness matters, so replace if older than six months.
- Unsweetened cocoa powder: 1 tablespoon; use natural cocoa for a classic cocoa aroma. It should be sifted with the flour to avoid lumps.
- Vanilla extract: 1 teaspoon; use pure vanilla for the best flavor. I often use Nielsen-Massey for a clean, rounded note.
- Red food coloring: 1 teaspoon gel or good-quality liquid such as AmeriColor for vibrant color without watering down batter. Add slowly until you reach the desired hue.
- Apple cider vinegar: 1 tablespoon; reacts with baking soda and buttermilk to help lift and intensify the red color slightly.
- Unsalted butter: 1/2 cup (1 stick) softened; creamed with sugar to create structure and tenderness.
- Large egg: 1 at room temperature; binds and adds moisture for a cakey crumb.
- Salt: 1/2 teaspoon; balances sweetness and enhances chocolate notes.
- Cream cheese: 1 cup full-fat, softened for a smooth, tangy filling. I recommend Philadelphia for consistent texture.
- Powdered sugar: 3 cups; sifted into the filling for a silky texture. Adjust slightly for your preferred sweetness.
Instructions
Prepare the Oven and Pans: Preheat the oven to 350 degrees Fahrenheit and line two baking sheets with parchment paper. Position racks in the center so heat circulates evenly. Use heavy baking sheets if possible to avoid rapid browning on the bottom. Combine Dry Ingredients: Whisk together 2 cups all-purpose flour, 1 teaspoon baking soda, 1 tablespoon cocoa powder, and 1/2 teaspoon salt in a bowl until evenly distributed. Sifting is optional but helps remove any lumps in the cocoa and ensures a uniform crumb. Cream Butter and Sugar: In a separate bowl, beat 1/2 cup softened unsalted butter with 1 cup granulated sugar until light and fluffy, about 3 to 4 minutes with an electric mixer. This aeration is crucial for a tender texture and helps with rise. Add Wet Ingredients: Beat in 1 large room temperature egg until incorporated. Add 1 cup room temperature buttermilk, 1 tablespoon apple cider vinegar, 1 teaspoon vanilla extract, and 1 teaspoon red food coloring. Mix until smooth and homogenous. The batter should be pourable but slightly thick. Combine Batter: Fold the dry mixture into the wet in two additions, mixing just until combined. Overmixing develops gluten and will make the cakes dense rather than soft. Scrape the bowl and stop when streaks disappear. Pipe Heart Shapes: Transfer batter to a piping bag fitted with a plain round tip or a sturdy zip-top bag with a corner snipped off. Pipe heart-shaped rounds about 2 1/2 inches wide, leaving space for spreading. If freehand is hard, use a template under the parchment to trace faint hearts with a pencil on the cooling rack then turn parchment over before piping. Bake and Cool: Bake for 10 to 12 minutes until the cakes spring back when lightly pressed and a toothpick comes out clean. Let cool on the sheet for 2 minutes, then transfer to a wire rack to cool completely before filling to prevent melting the filling. Make the Filling: Beat 1 cup softened full-fat cream cheese with 1/2 cup softened unsalted butter until smooth. Gradually add 3 cups powdered sugar and 1 teaspoon vanilla extract, beating until fluffy. If the filling is too loose, chill briefly to firm up before piping. Assemble Sandwiches: Pipe a generous dollop of filling onto the flat side of one heart-shaped cake and sandwich with another. Press gently to spread filling to the edges. Refrigerate for 15 to 20 minutes to set the filling before serving or packaging.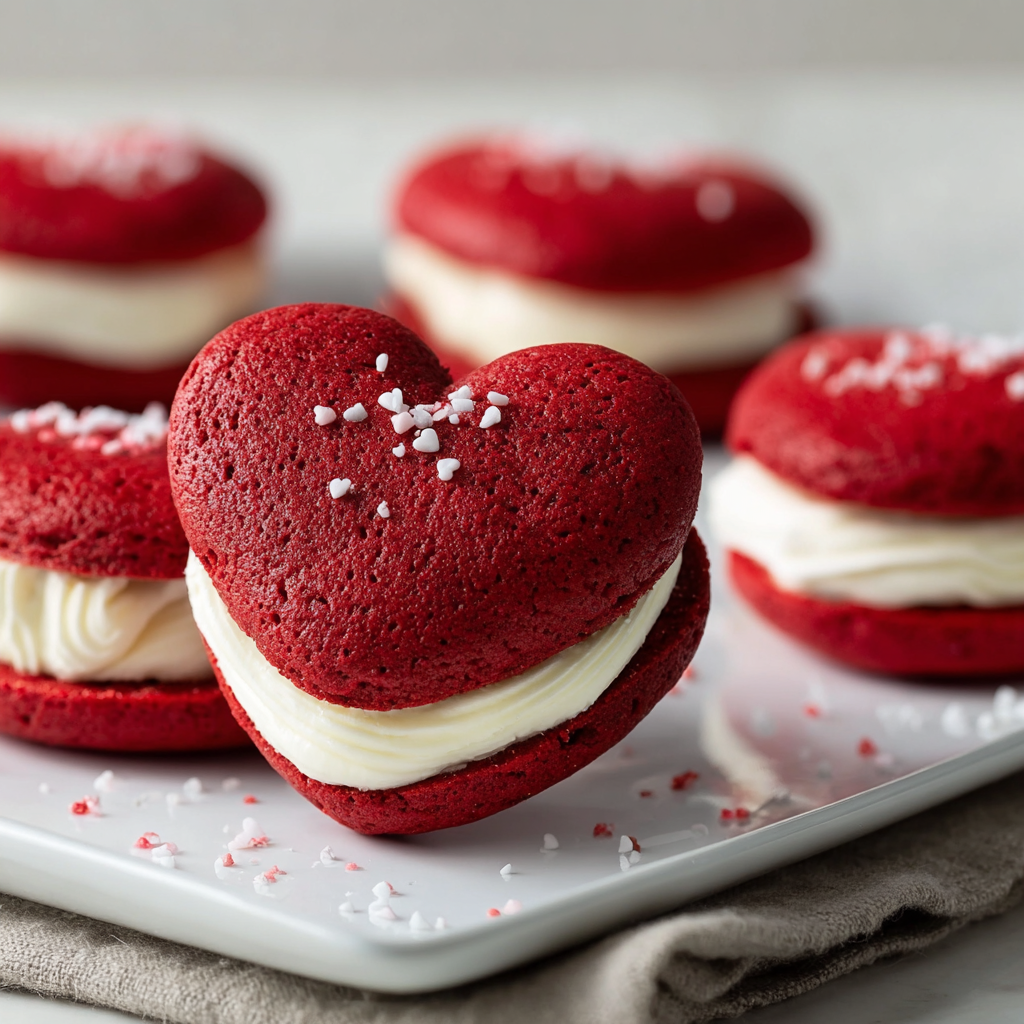
You Must Know
- The cakes freeze well without filling for up to three months; thaw in the refrigerator before filling and serving.
- This dessert is moderately high in sugar and fat; a single sandwich typically contains about 350 to 400 calories depending on filling thickness.
- Store assembled sandwiches refrigerated for up to five days in an airtight container, or freeze assembled ones for up to two months wrapped tightly.
- Using full-fat cream cheese gives the best texture and flavor. Low-fat versions can make the filling looser and less stable.
My favorite thing about these little sandwiches is how adaptable they are. I have wrapped trays of them for neighbors, brought them to classroom parties, and assembled mini versions for tea. The tang from the filling paired with the subtle cocoa in the cakes always gets compliments. Over time, I learned to keep the filling slightly firmer than my first batches so it does not squish out when stacked in a tin.
Storage Tips
To keep quality highest, store unfilled cakes in a single layer wrapped tightly in plastic at room temperature for up to two days. For longer storage, freeze completely cooled cakes on a tray until solid, then transfer to a freezer bag. When ready to use, thaw in the refrigerator for several hours before filling. Assembled sandwiches should be stored in the refrigerator in an airtight container for up to five days. To refresh slightly stale cakes, microwave briefly for 6 to 8 seconds per sandwich on low power, or let sit at room temperature to regain softness.

Ingredient Substitutions
If you do not have buttermilk, make a quick substitute by adding 1 tablespoon of white vinegar or lemon juice to a cup of milk and letting it sit for 10 minutes. For a dairy-free version, replace butter in the cakes with a plant-based stick butter and use dairy-free cream cheese for the filling, though texture and flavor will change slightly. If you prefer a milder sweetness, reduce powdered sugar in the filling by 1/2 cup and add 1 tablespoon of cornstarch to stabilize if needed. Cocoa can be swapped for Dutch-process, understanding the color and flavor will deepen.
Serving Suggestions
Serve chilled or at room temperature with a dusting of powdered sugar or a few fresh raspberries on the plate. Pair with a bold coffee or a vanilla tea to balance the sweetness. For special occasions, arrange on a tiered stand with edible flowers or freeze-dried rose petals for a romantic touch. These also travel well in a tin for picnics or gift baskets; line the box with parchment and separate layers with wax paper to keep them neat.
Cultural Background
The sandwich cake concept is inspired by regional American treats often called whoopie pies or sandwich cookies, with roots in New England and Pennsylvania Dutch traditions. Red velvet itself links to Southern baking traditions where its velvety texture and mild cocoa flavor became popular in celebration cakes. Combining the two traditions creates a small, portable treat that echoes vintage bake sale breads while offering a modern presentation in heart shapes.
Seasonal Adaptations
For spring, add a hint of citrus by folding 1 teaspoon of orange zest into the filling. In winter, infuse the cream cheese with 1/4 teaspoon ground cinnamon and top with crushed peppermint for a festive edge. For summer gatherings, make mini whoopie bites and add a thin layer of raspberry jam beneath the filling for brightness. Adjust piping size and chilling times for warm weather to maintain structure.
Meal Prep Tips
Make the cakes and filling ahead: bake the cakes and freeze them, then prepare the filling the night before. On the day you plan to serve, thaw the cakes in the refrigerator and assemble 2 hours before the event so the filling has time to set. Bring assembled sandwiches to room temperature 30 minutes before serving for the best mouthfeel. Use disposable piping bags for quick cleanup when preparing large batches.
These heart-shaped red velvet sandwiches bring a lot of warmth to any table. They are easy to personalize and hold up well during transport, making them ideal for gatherings and gifts. Try them once and you will find yourself baking them again and again for different occasions.
Pro Tips
Use room temperature ingredients to ensure even mixing and better rise.
Spoon and level flour when measuring or use a kitchen scale for accuracy.
Pipe the batter with a template under the parchment for consistent heart shapes.
Chill the filled sandwiches briefly before stacking to prevent squishing.
This nourishing heart-shaped red velvet whoopie pies recipe is sure to be a staple in your kitchen. Enjoy every moist, high protein slice — it is perfect for breakfast or as a wholesome snack any time.
FAQs about Recipes
Can I freeze these?
Yes. Freeze unfilled cakes on a tray until solid, then transfer to a freezer bag for up to three months. Thaw in the refrigerator before filling.
What if my filling is runny?
If the filling is too soft, chill it for 15 to 30 minutes to firm up before piping. If it becomes too stiff, whip briefly at room temperature.
Tags
Heart-Shaped Red Velvet Whoopie Pies
This Heart-Shaped Red Velvet Whoopie Pies recipe makes perfectly juicy, tender, and flavorful steak every time! Serve with potatoes and a side salad for an unforgettable dinner in under 30 minutes.
Ingredients
Whoopie Pie Cakes
Cream Cheese Filling
Instructions
Prepare the oven and pans
Preheat oven to 350 degrees Fahrenheit and line baking sheets with parchment paper. Position racks in the center for even heat.
Combine dry ingredients
Whisk together flour, baking soda, cocoa powder, and salt until evenly mixed. Sifting is optional but helpful.
Cream butter and sugar
Beat softened butter and granulated sugar until light and fluffy, about 3 to 4 minutes with an electric mixer, to incorporate air for a tender crumb.
Add wet ingredients
Beat in the egg, then add buttermilk, vinegar, vanilla, and red food coloring until the mixture is smooth and evenly colored.
Combine batter
Fold the dry mixture into the wet in two additions, mixing gently until just combined to avoid developing gluten.
Pipe heart shapes
Transfer batter to a piping bag and pipe heart-shaped rounds about 2 1/2 inches wide on prepared sheets, leaving space between each.
Bake and cool
Bake for 10 to 12 minutes until cakes spring back when pressed. Cool on a wire rack before filling to prevent melting the filling.
Make the filling
Beat cream cheese and butter until smooth, then gradually add powdered sugar and vanilla until fluffy. Chill if too soft.
Assemble sandwiches
Pipe filling onto the flat side of one cake, top with another, press gently, and chill briefly to set before serving or storing.
Last Step: Please leave a rating and comment letting us know how you liked this recipe! This helps our business to thrive and continue providing free, high-quality recipes for you.
Nutrition
Did You Make This?
Leave a comment & rating below or tag
@easywhiskrecipes on social media!
Categories:
You might also like...

Instant Pot Creamy Chicken and Rice
A quick and comforting one pot dinner of tender chicken, creamy rice, and vegetables cooked together in the Instant Pot for an easy weeknight meal.

Cinnamon Roll Pancake Stacks
Fluffy pancakes swirled with a warm cinnamon filling and finished with a silky cream cheese glaze. Perfect for weekend brunches and cozy mornings.

Caramel Apple Cheesecake Bars
Buttery graham crust, creamy cheesecake, spiced Granny Smith apples, crunchy streusel, and a ribbon of homemade caramel — perfect dessert bars for gatherings.
Did You Make This?
Leave a comment & rating below or tag @easywhiskrecipes on social media!
Rate This Recipe
Share This Recipe
Enjoyed this recipe? Share it with friends and family, and don't forget to leave a review!
Comments (1)
This recipe looks amazing! Can't wait to try it.
Comments are stored locally in your browser. Server comments are displayed alongside your local comments.

Hi, I'm Sophie!
What's Popular

30-Minute Meals!
Join to receive our email series which contains a round-up of some of our quick and easy family favorite recipes.