
>>

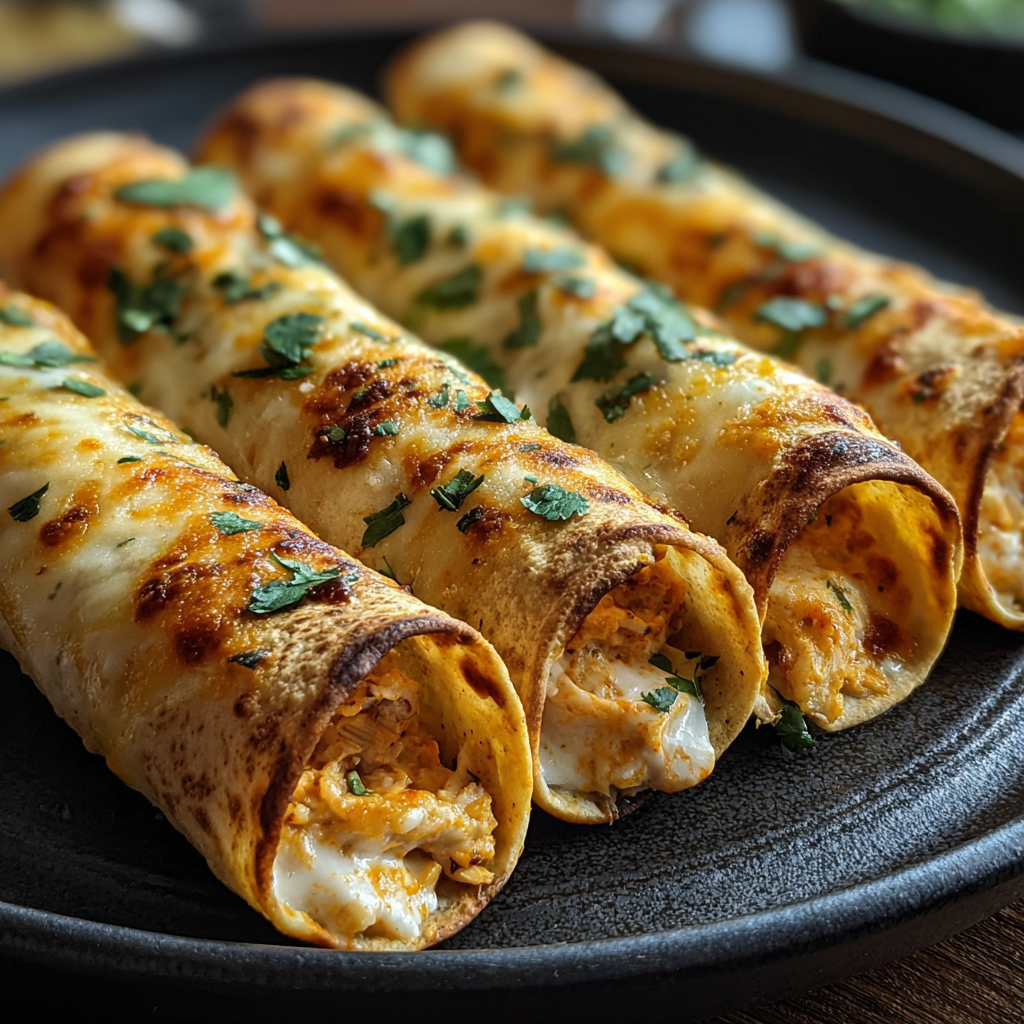
Golden, crunchy taquitos filled with creamy shredded chicken, melted cheese and warm spices — a quick, crowd-pleasing snack or weeknight supper.

This batch of crispy chicken taquitos is one of those dishes I reach for when I want something comforting, fast, and irresistible. I first learned this combination on a busy weeknight when I had leftover rotisserie meat and a fridge full of pantry staples. The result was a crunchy, creamy roll-up that disappeared faster than I could plate it. The contrast of hot, seasoned chicken and the cool tang of a dollop of sour cream or guacamole makes every bite sing.
What I love most about these taquitos is how simple they are to make and how flexible the ingredients can be. They’re an excellent way to stretch cooked chicken, and the method works equally well with store-bought rotisserie meat or poached breasts shredded by hand. The texture — crisp exterior wrapping a soft, cheesy inside — hits every note I want in a snack or casual dinner. When guests come over, these are the things people reach for first.
I remember serving these at a Sunday football watch party; my aunt brought chips and salsa, but the taquitos left both her and my cousin scraping the platter. My partner’s first bite included a loud, approving hum that I’ll never forget. Over time I’ve learned to adjust the filling so it never weeps and the shells stay crisp through serving time — a small detail that makes a big difference when you want perfect results every time.

My favorite aspect is how reliable this method is: the filling stays creamy while the exterior becomes satisfyingly crunchy. At holiday gatherings I make a double batch and freeze half because they reheat beautifully and always taste freshly made. Little tweaks — like a touch more cumin or a swap to pepper jack — become signatures and people remember them; it’s a small, personal dish that brings big, familiar comfort.
Store cooled taquitos in an airtight container in the refrigerator for up to 3 days. For best texture, reheat in the oven at 375°F (190°C) for 8–10 minutes rather than in the microwave; this restores the crisp shell. To freeze, place rolled but uncooked taquitos on a parchment-lined tray and freeze until solid (about 1 hour). Transfer to a labeled freezer bag and keep for up to 3 months. Bake from frozen, adding 5–8 minutes to the baking time and tossing on a little extra oil for crispness.
If you want to lighten the dish, swap full-fat cream cheese for a reduced-fat version or blend in mashed avocado for creaminess without dairy. Use shredded rotisserie turkey or canned chicken as a time-saver; adjust seasoning if using salted rotisserie meat. For dairy-free variations, replace cream cheese and shredded cheese with vegan cream cheese and dairy-free shredded cheese, or omit cheese entirely and add a tablespoon of mayonnaise for richness. Corn tortillas make it gluten-free — verify labels if cross-contamination is a concern.
Serve with chilled sides that contrast the hot crunch: a limey pico de gallo, cool sour cream, or chunky guacamole are classic. A simple cabbage slaw dressed with lime and a touch of honey cuts through richness and adds freshness. For a crowd, arrange on a platter with small bowls of toppings — cilantro, pickled onions, cotija or extra shredded cheese — so guests can customize. Pair with a light beer, margarita, or agua fresca for a balanced meal.
The rolled, fried or baked tortilla filled with savory meat is a staple in Mexican and Tex-Mex traditions, with regional variations across North America. Taquitos, or "small tacos," evolved as a convenient street or home food reminiscent of flautas; both refer to rolled tortillas but often differ by filling and region. This baked version leans into American convenience culture — using rotisserie chicken and an oven bake — while preserving the core elements of warm tortillas, seasoned meat and bright accompaniments.
In summer, use fresh salsa made from juicy tomatoes, sweet corn and charred peppers to lighten the filling. In colder months, incorporate roasted poblanos or sweet potatoes into the mix for a heartier profile. Holiday gatherings welcome a green-chile and cranberry twist or a smoky chipotle filling for deeper flavor. Small seasonal swaps keep the basic formula fresh and let you showcase local produce without changing the simple, quick technique.
For weekly meal prep, double the filling and portion into 2–3 tablespoon scoops, roll and freeze individually. Thaw in the refrigerator overnight and bake from chilled, which takes slightly longer than fresh. Pack two taquitos per lunch container with separate compartments for toppings to preserve crispness. Use sturdy glass or BPA-free plastic containers and include an ice pack if dairy-based dips travel with the meal.
Readers often tell me these are the first thing to disappear at potlucks. One friend substituted leftover brisket and returned with a photo of guests lining up for seconds; another household favorite is swapping in black beans and roasted peppers for a vegetarian weeknight option. These stories underscore how adaptable the method is and how a few simple tweaks produce memorable results every time.
Make these taquitos for a casual dinner, party snack, or meal prep staple — they’re forgiving, quick, and endlessly adaptable. Enjoy the crispy, cheesy comfort and make the recipe your own.
Warm tortillas before rolling to prevent cracks and keep the filling sealed.
Use block cheese shredded by hand for better melt and texture than pre-shredded bags.
Brush with oil instead of spraying for a more even, golden crust.
This nourishing crispy chicken taquitos recipe is sure to be a staple in your kitchen. Enjoy every moist, high protein slice — it is perfect for breakfast or as a wholesome snack any time.
This Crispy Chicken Taquitos recipe makes perfectly juicy, tender, and flavorful steak every time! Serve with potatoes and a side salad for an unforgettable dinner in under 30 minutes.
Preheat oven to 425°F (220°C). Line a baking sheet with parchment paper or lightly grease it and position a rack in the center.
In a large bowl, combine shredded chicken, softened cream cheese, shredded cheese, salsa and spices. Mix until the cream cheese is fully incorporated and the mixture is cohesive.
Warm the tortillas for about 20 seconds in the microwave wrapped in a damp paper towel or heat briefly in a dry skillet until pliable to prevent cracking while rolling.
Spoon 2–3 tablespoons of filling onto one side of each tortilla and roll tightly. Place seam-side down on the prepared baking sheet to seal.
Lightly brush each taquito with oil or spray with cooking spray and space them apart on the sheet for even air circulation.
Bake for 15–20 minutes until golden brown and crisp, rotating the pan halfway through. For extra crispness, broil 1–2 minutes at the end, watching closely.
Allow to cool 1–2 minutes before serving. Garnish with cilantro, sour cream, guacamole and lime wedges as desired.
Last Step: Please leave a rating and comment letting us know how you liked this recipe! This helps our business to thrive and continue providing free, high-quality recipes for you.
Leave a comment & rating below or tag
@easywhiskrecipes on social media!

A quick and comforting one pot dinner of tender chicken, creamy rice, and vegetables cooked together in the Instant Pot for an easy weeknight meal.

Fluffy pancakes swirled with a warm cinnamon filling and finished with a silky cream cheese glaze. Perfect for weekend brunches and cozy mornings.

Buttery graham crust, creamy cheesecake, spiced Granny Smith apples, crunchy streusel, and a ribbon of homemade caramel — perfect dessert bars for gatherings.
Leave a comment & rating below or tag @easywhiskrecipes on social media!
Enjoyed this recipe? Share it with friends and family, and don't forget to leave a review!
This recipe looks amazing! Can't wait to try it.
Comments are stored locally in your browser. Server comments are displayed alongside your local comments.

Join to receive our email series which contains a round-up of some of our quick and easy family favorite recipes.
