
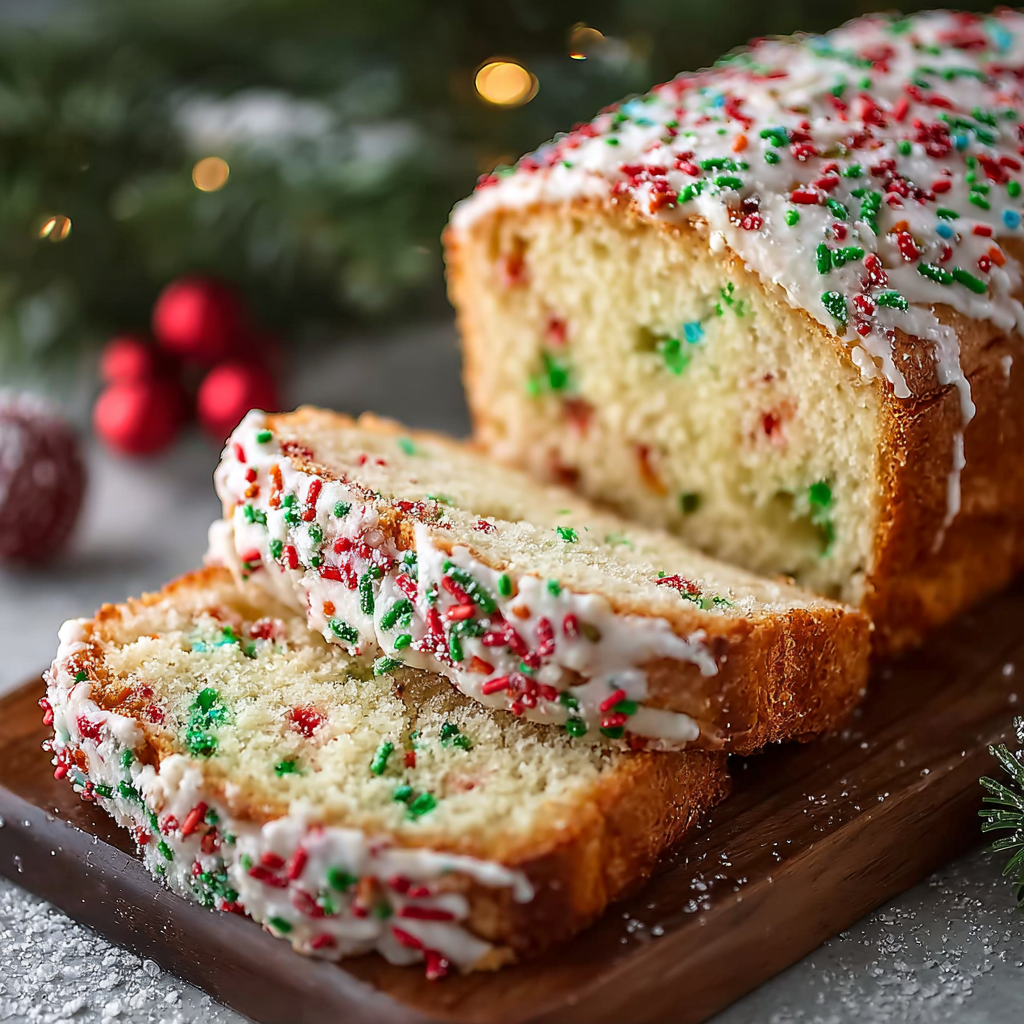
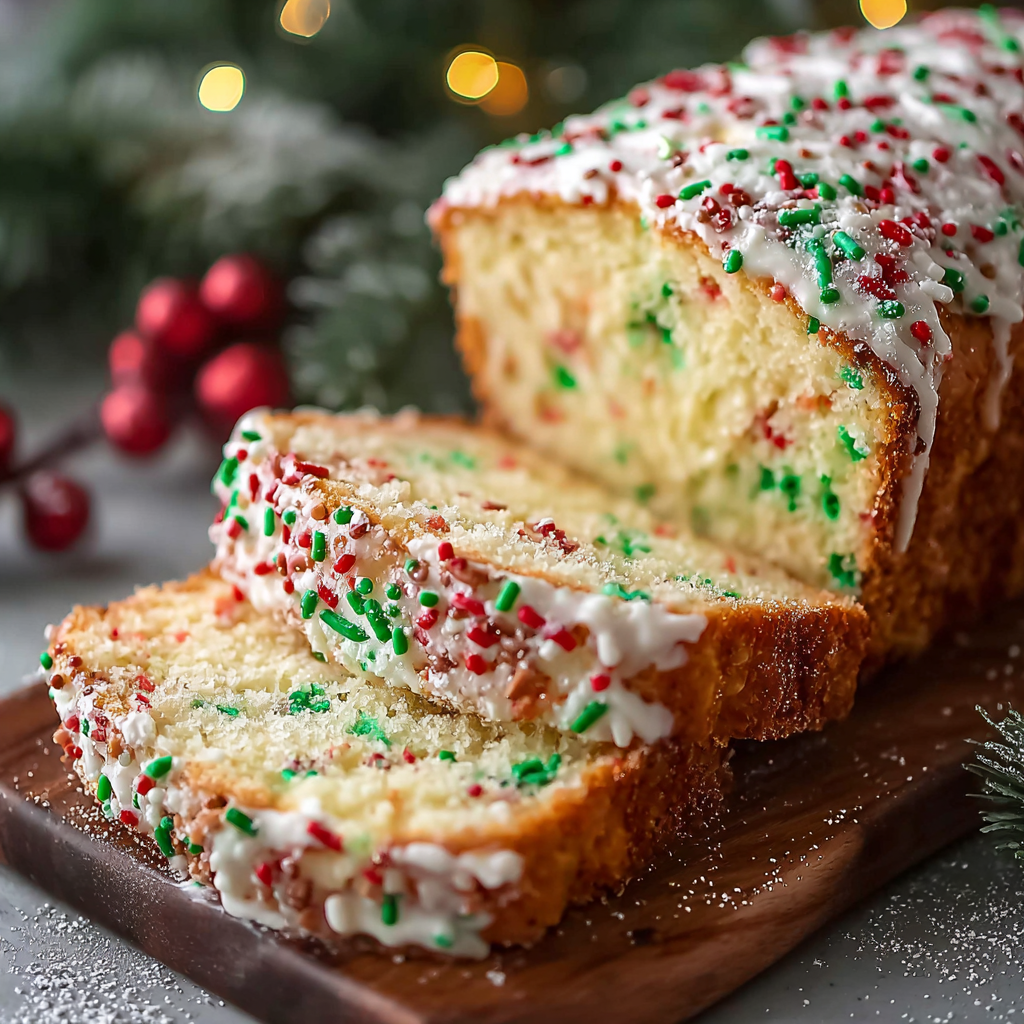
Christmas Sprinkle Buttermilk Bread

A festive, tender loaf studded with red and green jimmies, enriched with buttermilk and butter — perfect for holiday breakfasts, coffee breaks, or as a cheerful gift.
This Christmas Sprinkle Buttermilk Bread is one of those recipes that immediately lifts the mood in the kitchen. I discovered this loaf during a holiday baking marathon the first year I wanted a simple, shareable treat that looked festive without resorting to complicated decorating. The crumb is tender and moist thanks to the buttermilk and melted butter, and the red-and-green jimmies create little pockets of celebratory color without turning the batter into a structural challenge. It’s the kind of loaf I slice thick for breakfast with a smear of butter, or thin to serve alongside coffee at a neighbor drop-off.
What makes this loaf special is its balance: it isn’t overly sweet, the texture is soft but sturdy for toasting, and the sprinkles add crunch and bright flecks of color rather than melting into a messy streak. I first baked it for a small family brunch, and watching the kids’ faces as they opened the box felt like unwrapping a present. Over the years I’ve refined the method — careful folding of sprinkles, a short rest before slicing, and a quick sprinkle of coarse sugar on top for a subtle sparkle — and it’s become my go-to easy holiday loaf to bring when I’m pressed for time but want to impress.
Why You'll Love This Recipe
- Ready in under an hour of active time and about an hour total, this loaf is a fast way to add holiday cheer to any morning without complicated decorating.
- Uses pantry staples — flour, sugar, eggs, butter, and buttermilk — so you can pull it together even last minute for guests or gift boxes.
- The buttermilk provides a tender, tangy crumb that keeps the bread moist for days when stored properly, making great make-ahead options.
- Jimmies-style sprinkles keep their shape and color better than nonpareils, so the loaf looks festive without the colors bleeding into the batter.
- Versatile for breakfast, brunch, or a sweet snack; slices toast beautifully or can be topped with cream cheese for a richer treat.
- Simple technique with beginner-friendly steps — no special equipment required beyond a loaf pan and a mixing bowl.
I’ve baked dozens of these loaves over the years and found that little changes — like letting the melted butter cool slightly before whisking with sugar, or adding the sprinkles at the very end — make a big difference. Family and friends have called it “the cheerful loaf,” and it’s often the first thing requested when someone needs a quick hostess gift or a last-minute contribution to a holiday coffee hour.
Ingredients
- All-purpose flour (1 3/4 cups): Use regular, unbleached flour for best tenderness and structure; spoon into the measuring cup and level off for accuracy. King Arthur or Bob's Red Mill work well.
- Baking powder (1 teaspoon) and baking soda (1/2 teaspoon): Leavening balance gives an even rise — make sure your baking powder is fresh for the best lift.
- Salt (1/2 teaspoon): Enhances flavor and balances the sweetness; kosher or fine sea salt are both fine.
- Unsalted butter (1/2 cup, melted): Melt and cool slightly so it blends smoothly with sugar; unsalted lets you control sodium.
- Granulated sugar (1 cup): Standard white sugar keeps the crumb light and classic; for a deeper flavor, substitute part with light brown sugar (see substitutions).
- Eggs (2 large): Bring to room temperature for better emulsion and rise.
- Buttermilk (1 cup): Provides tang and tenderness; if you don’t have it, see the substitution tip below to make a quick buttermilk.
- Vanilla extract (2 teaspoons): Adds warmth and aroma that complements the sprinkles without overpowering the loaf.
- Red and green jimmies (1/2 cup): Use non-melting jimmies (not nonpareils) to maintain color and prevent bleeding into the batter.
- Optional topping: 1 tablespoon coarse sugar and additional sprinkles for garnish to add sparkle and slight crunch on the crust.
Instructions
Preheat and prepare the pan: Preheat the oven to 350°F. Grease a 9×5-inch loaf pan and line with parchment if you like for easy removal; leave a slight overhang so you can lift the loaf out to cool completely. The moderate oven ensures an even, golden crust within the bake time. Mix dry ingredients: In a medium bowl whisk together 1 3/4 cups all-purpose flour, 1 teaspoon baking powder, 1/2 teaspoon baking soda, and 1/2 teaspoon salt. Sifting is optional; whisking will remove lumps and evenly distribute leaveners for a consistent rise. Combine butter and sugar: In a large bowl whisk 1/2 cup melted butter with 1 cup granulated sugar until smooth and slightly glossy. Let the butter cool for a few minutes so the eggs won’t scramble when added, then whisk in the eggs one at a time until incorporated. Add liquids: Stir in 2 teaspoons vanilla and 1 cup buttermilk. The batter will be fairly loose — this is normal. The acidity in buttermilk reacts with baking soda to give lift and a tender crumb. Combine wet and dry: Gradually fold the dry ingredients into the wet with a rubber spatula just until no streaks of flour remain. Overmixing develops gluten and will make the loaf tough; stop as soon as the batter is uniform. Fold in sprinkles: Gently fold in 1/2 cup red and green jimmies with 6–8 strokes — you want them distributed without grinding the color into the batter. Use jimmies (rod-shaped) rather than nonpareils to avoid color bleeding. Transfer and top: Pour the batter into the prepared pan and smooth the top. Sprinkle with 1 tablespoon coarse sugar and a few extra jimmies if desired. The coarse sugar gives a pretty, crackly finish on the crust. Bake and test: Bake 45–55 minutes at 350°F until the top is golden and a toothpick inserted near the center comes out clean or with a few moist crumbs. Rotate the pan halfway through if your oven has hot spots. Cool before slicing: Cool in the pan 10–15 minutes, then lift out using the parchment and cool completely on a rack before slicing. Warm bread can crumble; waiting yields cleaner slices and a better texture.
You Must Know
- This loaf stores well wrapped at room temperature for up to 2 days and in the refrigerator for up to 5 days; freeze tightly wrapped for up to 3 months.
- Using jimmies prevents color bleeding that can happen with nonpareils; sprinkling at the end preserves bright flecks on top.
- Make-ahead tip: bake and freeze whole, then thaw overnight for easy hosting or gifting; slices also thaw quickly in a toaster.
- Nutrition note: a moderate slice offers about 300–350 calories depending on thickness; reduce sugar slightly if you prefer a less sweet loaf.
My favorite part is how this loaf looks when sliced — the tiny red and green specks scattered through a tender, buttery crumb always feel like unwrapping a small holiday surprise. I’ve brought it to cookie exchanges, wrapped halves for neighbors, and served it on Christmas morning with ricotta and honey. It’s simple but delightfully festive, and every time someone asks for the recipe I know it’s earned its place in our holiday rotation.
Storage Tips
Store the cooled loaf wrapped tightly in plastic wrap or in an airtight container. At room temperature it will stay fresh for 48 hours; for longer keeping, refrigerate up to five days. To freeze, double-wrap in plastic and foil or use a freezer bag; thaw at room temperature or toast slices straight from frozen. When reheating, a quick 20–30 second zap in the microwave or 3–4 minutes at 325°F in the oven brings back crisp edges and tender crumb. Avoid leaving it uncovered to prevent drying.
Ingredient Substitutions
If you don’t have buttermilk, make a quick substitute by adding 1 tablespoon lemon juice or white vinegar to a measuring cup, then add milk to make 1 cup and let sit 5 minutes. For a richer loaf, swap 1/4 cup of the butter for sour cream; for a slightly deeper flavor, replace 1/4 cup of granulated sugar with light brown sugar. Use dairy-free butter and plant-based milk with 1 tablespoon vinegar for a dairy-free version, though color and crumb will vary. Avoid nonpareils to prevent bleeding.
Serving Suggestions
Slice this loaf and serve warm with softened butter, ricotta and honey, or a smear of mascarpone for an indulgent touch. It pairs beautifully with coffee, tea, or mulled cider and makes a cheerful addition to holiday brunch boards alongside fruit and yogurt. For a festive dessert, serve toasted slices with a scoop of vanilla ice cream and a drizzle of salted caramel. Garnish with extra sprinkles or a light dusting of powdered sugar for gatherings.
Cultural Background
Quick festive loaves like this one are part of a long tradition of celebratory baked goods that require minimal time but deliver maximum cheer. While not tied to a single region, colorful quick breads have become staples in American holiday baking — they echo the idea of “funfetti” cakes and cookies popularized in home baking culture. This loaf blends classic American quick-bread technique with holiday aesthetics, making it especially popular at community potlucks and church bazaars.
Seasonal Adaptations
For winter holidays, use red and green jimmies as written; for other seasons swap sprinkle colors to match occasions (pastels for spring, orange and brown for fall). Add 1/2 teaspoon ground cinnamon or a pinch of nutmeg for a warming winter spice note. In summer, fold in 1/2 cup fresh berries and reduce sprinkles to avoid color bleed. For a citrus twist, add 1 teaspoon grated lemon zest to the batter and a simple lemon glaze after cooling.
Meal Prep Tips
This loaf is ideal for meal prep: slice it and freeze in single layers separated by parchment so you can grab a slice each morning. Label and date packages; use within three months. To speed mornings, toast frozen slices directly and top with nut butter or ricotta. If preparing for a crowd, bake multiple loaves a day ahead and store at room temperature for 24 hours, then refrigerate and bring to room temperature before serving to refresh the texture.
There’s a special joy in handing someone a wrapped slice of this loaf — it’s simple, bright, and made with very little fuss. Whether you serve it for breakfast, pack it for friends, or slice it for a brunch spread, this festive buttermilk loaf is designed to be enjoyed and shared. Try it once and you’ll see why it’s become a holiday staple in my kitchen.
Pro Tips
Bring eggs and buttermilk to room temperature before mixing to improve emulsion and rise.
Fold sprinkles in as the last step with minimal strokes to avoid color bleed and batter overmixing.
Cool the loaf in the pan 10–15 minutes before removing to maintain shape and avoid cracking.
If you don’t have buttermilk, use 1 cup milk plus 1 tablespoon vinegar or lemon juice, let sit 5 minutes.
This nourishing christmas sprinkle buttermilk bread recipe is sure to be a staple in your kitchen. Enjoy every moist, high protein slice — it is perfect for breakfast or as a wholesome snack any time.
Tags
Christmas Sprinkle Buttermilk Bread
This Christmas Sprinkle Buttermilk Bread recipe makes perfectly juicy, tender, and flavorful steak every time! Serve with potatoes and a side salad for an unforgettable dinner in under 30 minutes.
Instructions
Preheat and prepare pan
Preheat oven to 350°F (175°C). Grease a 9×5-inch loaf pan and line with parchment for easier removal.
Whisk dry ingredients
In a medium bowl, whisk together flour, baking powder, baking soda, and salt until evenly combined.
Combine butter and sugar
In a large bowl, whisk melted butter and sugar until smooth. Allow butter to cool slightly, then whisk in eggs one at a time.
Add liquids
Stir in vanilla extract and buttermilk until the mixture is smooth and slightly loose in consistency.
Fold dry into wet
Gradually stir the dry ingredients into the wet mixture until just combined; avoid overmixing to prevent a tough crumb.
Fold in sprinkles
Gently fold in the jimmies-style sprinkles with minimal strokes to prevent color bleeding and batter overworking.
Transfer to pan and top
Pour batter into prepared pan, smooth the top, and sprinkle with coarse sugar or extra sprinkles if desired.
Bake and cool
Bake 45–55 minutes at 350°F until a toothpick inserted near the center comes out clean. Cool in pan 10–15 minutes, then transfer to a rack to cool completely before slicing.
Last Step: Please leave a rating and comment letting us know how you liked this recipe! This helps our business to thrive and continue providing free, high-quality recipes for you.
Nutrition
Did You Make This?
Leave a comment & rating below or tag
@easywhiskrecipes on social media!
Categories:
You might also like...

Instant Pot Creamy Chicken and Rice
A quick and comforting one pot dinner of tender chicken, creamy rice, and vegetables cooked together in the Instant Pot for an easy weeknight meal.

Cinnamon Roll Pancake Stacks
Fluffy pancakes swirled with a warm cinnamon filling and finished with a silky cream cheese glaze. Perfect for weekend brunches and cozy mornings.

Caramel Apple Cheesecake Bars
Buttery graham crust, creamy cheesecake, spiced Granny Smith apples, crunchy streusel, and a ribbon of homemade caramel — perfect dessert bars for gatherings.
Did You Make This?
Leave a comment & rating below or tag @easywhiskrecipes on social media!
Rate This Recipe
Share This Recipe
Enjoyed this recipe? Share it with friends and family, and don't forget to leave a review!
Comments (1)
This recipe looks amazing! Can't wait to try it.
Comments are stored locally in your browser. Server comments are displayed alongside your local comments.

Hi, I'm Sophie!
What's Popular

30-Minute Meals!
Join to receive our email series which contains a round-up of some of our quick and easy family favorite recipes.