
Christmas Red Velvet Cheesecake

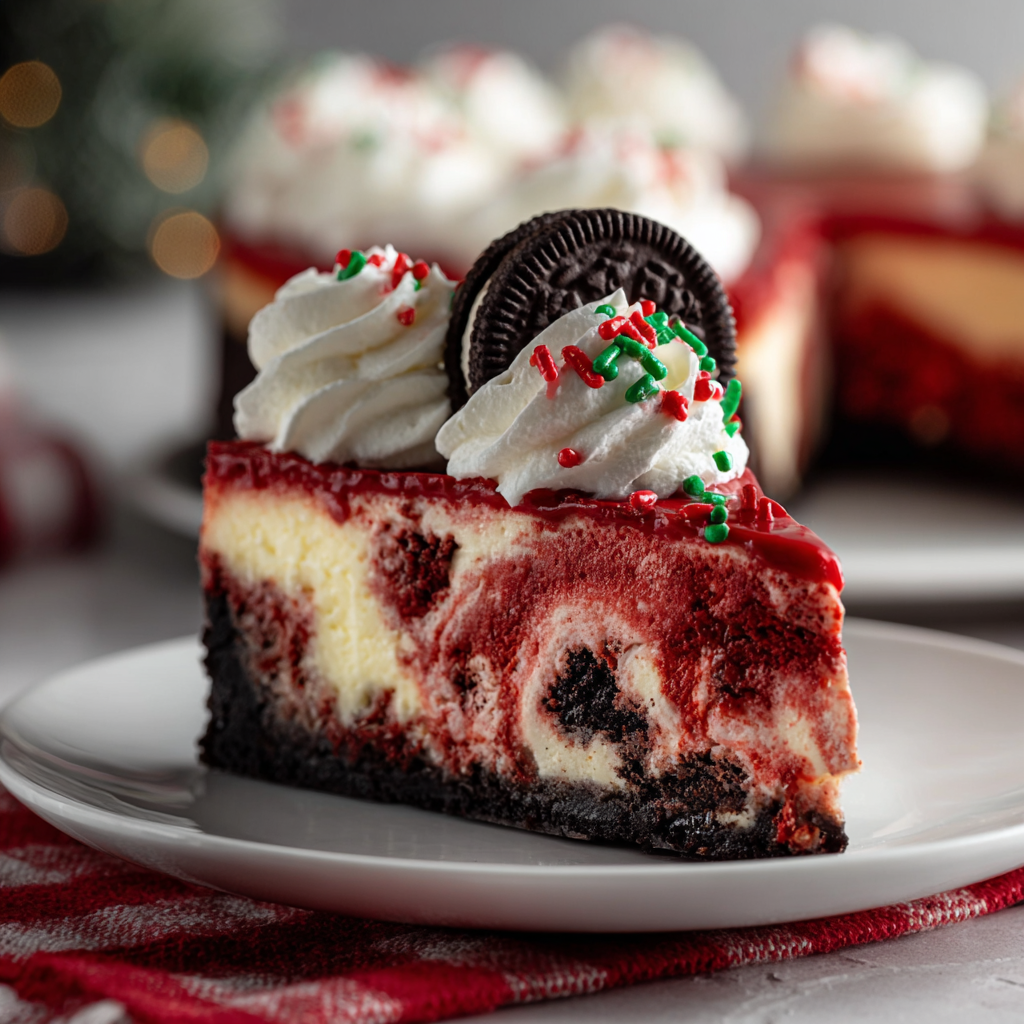
A festive red velvet cheesecake with an Oreo crust, creamy red-hued filling studded with sprinkles, and a whipped cream finish — perfect for holiday dessert tables.

This Christmas red velvet cheesecake became a holiday tradition the first winter I swapped the usual chocolate torte for something brighter and more playful. I discovered the combination while unpacking tins of cookie crumbs and a jar of festive sprinkles; the vivid red filling against a dark Oreo crust immediately felt like holiday magic. The texture is luxuriously smooth — dense but not heavy — with a slight cocoa note and cream cheese tang balanced by the sweet whipped cream topping. I still remember serving this to a table of skeptical relatives who had never met a red velvet and cheesecake hybrid; every forkful earned approving hums and requests for the recipe.
What makes this version special is the contrast: crunchy Oreo base, velvety cream-cheese filling, and tiny pops of color and crunch from the sprinkles. It’s forgiving for home bakers because the filling uses whipped heavy cream folded in for lift and a lighter mouthfeel, while the water bath protects the delicate center from cracking. I always prepare the filling with room-temperature cream cheese and a good stand mixer to ensure no lumps, and I wrap the springform pan tightly with heavy-duty foil so that the water bath does its job. Over the years I’ve adjusted baking time and cooling steps to guarantee a clean cut and a picture-perfect slice every time.
Why You'll Love This Recipe
- Bright, festive presentation: the red-hued filling set against a dark Oreo crust creates a gorgeous contrast that looks impressive on any dessert table.
- Make-ahead friendly: can be baked a day ahead and chilled overnight for reliable texture and easier slicing on the day of serving.
- Uses pantry-friendly ingredients: Oreos, cream cheese, heavy cream, and basic baking staples mean you probably have what you need already.
- Simple technique, impressive results: the water-bath method prevents cracks and gives a silky center without complicated ingredients or steps.
- Quick assembly: the crust bakes in about 8–10 minutes and the filling is whipped and folded in under 20 minutes; total active hands-on time is modest.
- Crowd-pleaser: familiar flavors with a holiday twist make this a dessert that appeals to adults and kids alike.
I first made this during a particularly busy holiday season when I wanted a dessert that looked elaborate but didn’t require advanced plating. My family loved the playful sprinkles tucked into the filling, and guests kept asking what made the color so vibrant. Over the years I’ve learned to be conservative with food coloring — a few drops achieve the deep red without affecting flavor — and to keep a bowl of hot water and a towel nearby for warming the knife between slices for clean cuts.
Ingredients
- Oreo cookies (crust): 24 cookies (about 2 cups of finely crushed crumbs). Use classic Oreos for the right balance of chocolate and sweetness; reserve a few minis for garnish.
- Butter: 1/3 cup melted (about 5 tbsp + 1 tsp). Regular salted butter is fine; melted butter binds the crumbs and crisps as it bakes.
- White sugar (crust): 2 tablespoons. A touch of sugar helps set the crust and balances the cocoa in the filling.
- Cream cheese: Four 8-ounce blocks (32 ounces total), softened to room temperature. Full-fat cream cheese yields the richest texture; brands like Philadelphia give consistent results.
- White sugar (filling): 1/2 cup. Fine granulated sugar blends smoothly into the cream cheese for even sweetness.
- Heavy whipping cream: 2 cups (divided: 1 cup whipped into the filling, 1 cup reserved for topping). Chill the bowl and beaters for easier whipping.
- Vanilla extract: 1 teaspoon. Use pure vanilla for the best aromatic lift.
- Cocoa powder: 2 tablespoons unsweetened. Adds red velvet depth and a hint of chocolate without overpowering the cream cheese.
- Red food coloring: As needed for desired shade — gel colors are more concentrated and keep the filling from thinning.
- Christmas sprinkles: 1/4 cup for the filling and extra for garnish. Use sturdy nonpareils or jimmies that hold up in the batter.
- Whipped cream: For topping — sweeten lightly if desired and pipe for a festive finish.
- Mini Oreos & extra sprinkles: For garnish and visual appeal.
Instructions
Step 1 — Prepare pan and preheat: Preheat the oven to 350°F (175°C). Wrap a 9-inch springform pan tightly with heavy-duty aluminum foil to prevent water seepage during the water bath; make two layers if your foil is thin. Place a rack in the lower third of the oven so the water bath can fit underneath the pan without touching the lid. Step 2 — Make the crust: Crush 24 Oreo cookies finely (use a food processor or place in a zip-top bag and crush with a rolling pin). Mix 2 cups of crumbs with 1/3 cup melted butter and 2 tablespoons sugar until the texture resembles wet sand. Press firmly and evenly into the bottom of the prepared springform pan using the bottom of a measuring cup. Bake 8–10 minutes, then cool completely on a wire rack. Step 3 — Prepare the filling: Beat room-temperature cream cheese in a stand mixer until smooth. Gradually add 1/2 cup sugar and beat until just combined — avoid overbeating. Add 1 teaspoon vanilla, 2 tablespoons cocoa powder, and red food coloring a few drops at a time until you reach a vibrant red. In a separate chilled bowl, whip 1 cup heavy cream to soft peaks, then fold gently into the cream cheese mixture until uniform. Fold in 1/4 cup sprinkles, being careful not to overmix. Step 4 — Assemble and bake in a water bath: Pour the filling over the cooled crust and smooth the top. Reduce the oven temperature to 325°F (160°C). Place the foil-wrapped pan into a larger roasting pan and carefully pour hot water into the roasting pan to reach halfway up the sides of the springform. Bake 1 hour to 1 hour 15 minutes, or until the edges are set and the center jiggles slightly when nudged. Step 5 — Cool slowly: Turn off the oven and leave the cheesecake inside with the door slightly ajar for 1 hour to prevent sudden temperature changes that cause cracks. Remove the cheesecake from the water bath and cool completely on a wire rack for 2–3 hours. Run a thin knife around the edge to loosen, then cover loosely and chill at least 6–8 hours or overnight until firm. Step 6 — Finish and serve: Remove the sides of the springform. Pipe or spread whipped cream on top, garnish with mini Oreos and extra sprinkles. For clean slices, dip a sharp knife in hot water, dry it, and slice, wiping the blade between cuts.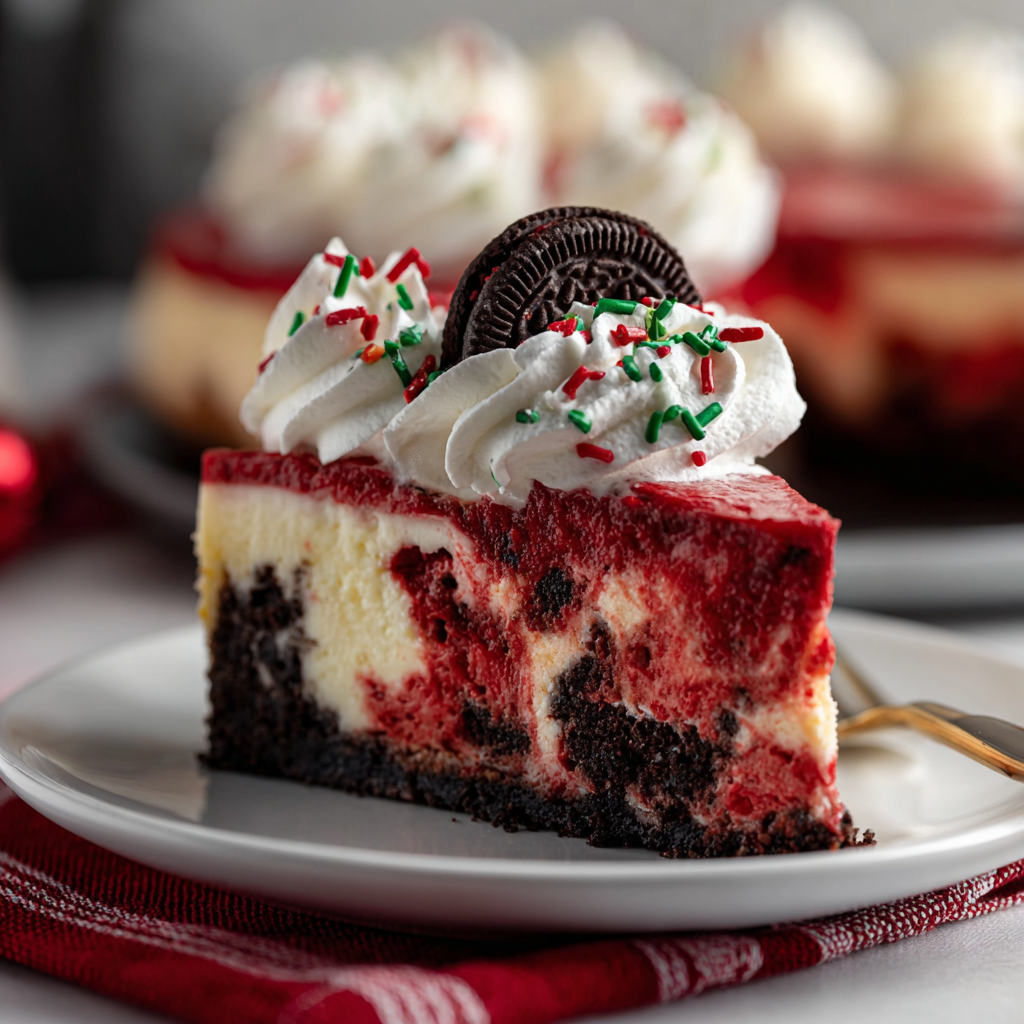
You Must Know
- The cheesecake benefits from slow, gentle cooling: abrupt temperature changes cause cracks, so the oven-hold step plus overnight chilling are essential.
- This dessert freezes well for up to 3 months; wrap tightly in plastic and then foil. Thaw in the refrigerator overnight before serving.
- Because the crust contains wheat and the filling contains dairy, this is not suitable for gluten-free or dairy-free diets without substitutions.
- Using gel food coloring gives you deep red color with minimal liquid addition; a few drops usually suffice.
My favorite part is how the sprinkles peek through the slices — they make each bite a little festive surprise. Family gatherings have turned into an informal contest of who can get the cleanest slice, and I always end up showing the trick of dipping a knife in hot water before slicing. The quiet satisfaction of watching the cheesecake set in the fridge overnight is one of those small holiday rituals I cherish: it feels like finishing a present for the table.
Storage Tips
Store leftovers covered in the refrigerator for up to 4–5 days; keep a loose piece of plastic wrap over the top to avoid crushing the whipped cream topping. For longer storage, slice into individual portions, wrap each slice tightly in plastic, then foil, and freeze for up to 3 months. To reheat slices from frozen, thaw overnight in the refrigerator and bring to room temperature 20–30 minutes before serving. Quality indicators: the filling should remain smooth and not grainy; if condensation accumulates, briefly blot before plating.
Ingredient Substitutions
For a gluten-free crust, substitute gluten-free chocolate sandwich cookies or a graham-alternative cookie at a 1:1 crumb volume; be mindful that textures vary. To make a lighter filling, use reduced-fat cream cheese and a lighter whipped topping, though texture will be less dense and creamy. For an eggless but dairy-free version, consider a firm vegan cream cheese and coconut cream whipped to peaks; however, freezing and chilling behavior will differ. If you lack gel food coloring, very concentrated liquid dye works but add less and mix thoroughly to avoid thinning the filling.
Serving Suggestions
Serve thin slices with a dollop of lightly sweetened whipped cream and a few mini Oreos for garnish. Pair with bitter espresso or a sparkling cranberry cocktail to cut through the richness. For a holiday buffet, plate slices on doilies with a small sprig of mint and a scattering of extra sprinkles for color. This cheesecake also makes a showstopping centerpiece when surrounded by fresh berries or sugared cranberries for a seasonal touch.
Cultural Background
While classic red velvet owes its origins to a Southern American cake tradition prized for its cocoa-tinged tang and red hue, this interpretation combines that iconic flavor profile with a New York–style creamy base. The Oreo crust nods to modern American dessert culture, where sandwich cookies and cream cheese often meet in no-bake bars and tarts. The fusion creates a holiday-friendly hybrid that borrows the cozy nostalgia of red velvet cake and the luxurious texture of cheesecake.
Seasonal Adaptations
In winter, fold in crushed peppermint candies on top of the whipped cream for a festive mint twist. For spring or summer events, omit the sprinkles and finish with fresh strawberries and a light dusting of cocoa. Around Thanksgiving, add a teaspoon of espresso powder to the filling to deepen the chocolate notes and complement pumpkin-forward menus. Small adjustments to garnish and spice allow this dessert to suit seasonal palettes without changing the core technique.
Meal Prep Tips
Make the crust and filling a day ahead: chill the crust after baking, then assemble and refrigerate overnight for a reliably firm set. If preparing for a large gathering, freeze individual slices on a sheet pan before bagging — this makes transport and last-minute serving straightforward. Keep a small container of extra sprinkles and mini Oreos on hand to refresh the garnish just before serving to retain visual appeal.
Bring this to your next holiday table and watch it become a new favorite — it’s festive, forgiving, and truly joyful to make and share.
Pro Tips
Soften cream cheese to room temperature for a lump-free filling; use a stand mixer for smoothness.
Wrap the springform pan with heavy-duty foil (double-wrap if necessary) so no water seeps into the crust during the water bath.
Dip a sharp knife in hot water and wipe it dry between cuts to get clean, neat slices.
This nourishing christmas red velvet cheesecake recipe is sure to be a staple in your kitchen. Enjoy every moist, high protein slice — it is perfect for breakfast or as a wholesome snack any time.
FAQs about Recipes
Can I freeze this cheesecake?
Yes — wrap the cooled cheesecake tightly and freeze for up to 3 months. Thaw overnight in the refrigerator before serving.
How do I get a deep red color without affecting texture?
Use gel food coloring; add a few drops at a time until you reach your desired shade. Avoid adding too much liquid coloring.
Tags
Christmas Red Velvet Cheesecake
This Christmas Red Velvet Cheesecake recipe makes perfectly juicy, tender, and flavorful steak every time! Serve with potatoes and a side salad for an unforgettable dinner in under 30 minutes.
Ingredients
Crust
Filling
Topping & Garnish
Instructions
Prepare pan and preheat
Preheat oven to 350°F (175°C). Wrap a 9-inch springform pan tightly with heavy-duty aluminum foil to prevent water seepage during the water bath.
Make the crust
Crush 24 Oreos into fine crumbs, combine with 1/3 cup melted butter and 2 tablespoons sugar. Press into the bottom of the springform pan and bake 8–10 minutes. Cool completely on a wire rack.
Prepare the filling
Beat softened cream cheese until smooth. Add 1/2 cup sugar, vanilla, cocoa powder, and red food coloring to desired shade. Whip 1 cup heavy cream to soft peaks and fold into cream cheese; fold in 1/4 cup sprinkles.
Assemble and bake in a water bath
Pour filling over cooled crust. Reduce oven to 325°F (160°C). Place the wrapped pan in a larger roasting pan and add hot water halfway up the sides. Bake 1 hour to 1 hour 15 minutes until edges set and center jiggles.
Cool slowly and chill
Turn off oven and leave cheesecake inside with door ajar for 1 hour. Remove from water bath and cool on a rack 2–3 hours. Loosen edge, cover, and refrigerate 6–8 hours or overnight.
Serve and garnish
Remove springform side, top with whipped cream, mini Oreos, and sprinkles. For clean slices, heat a knife in hot water, dry it, and wipe between cuts.
Last Step: Please leave a rating and comment letting us know how you liked this recipe! This helps our business to thrive and continue providing free, high-quality recipes for you.
Nutrition
Did You Make This?
Leave a comment & rating below or tag
@easywhiskrecipes on social media!
Categories:
You might also like...

Instant Pot Creamy Chicken and Rice
A quick and comforting one pot dinner of tender chicken, creamy rice, and vegetables cooked together in the Instant Pot for an easy weeknight meal.

Cinnamon Roll Pancake Stacks
Fluffy pancakes swirled with a warm cinnamon filling and finished with a silky cream cheese glaze. Perfect for weekend brunches and cozy mornings.

Caramel Apple Cheesecake Bars
Buttery graham crust, creamy cheesecake, spiced Granny Smith apples, crunchy streusel, and a ribbon of homemade caramel — perfect dessert bars for gatherings.
Did You Make This?
Leave a comment & rating below or tag @easywhiskrecipes on social media!
Rate This Recipe
Share This Recipe
Enjoyed this recipe? Share it with friends and family, and don't forget to leave a review!
Comments (1)
This recipe looks amazing! Can't wait to try it.
Comments are stored locally in your browser. Server comments are displayed alongside your local comments.

Hi, I'm Sophie!
What's Popular

30-Minute Meals!
Join to receive our email series which contains a round-up of some of our quick and easy family favorite recipes.