
Cheesy Chicken Enchiladas Creamy

Comforting, creamy enchiladas filled with shredded chicken and two cheeses, topped with more cheese and warm enchilada sauce for a weeknight favorite.

Why You'll Love This Recipe
- This dish comes together quickly using cooked chicken and pantry items so it is ready in roughly 45 minutes from start to finish, perfect for busy evenings.
- The filling is creamy thanks to sour cream and a can of cream of chicken soup which means no roux or extra steps are required to build richness.
- It uses accessible ingredients you can find at any supermarket including shredded cheddar and Monterey Jack which melt evenly and provide flavor contrast.
- Make ahead friendly, you can assemble the pan, cover, and refrigerate for up to 24 hours before baking making it a great option for entertaining.
- Customizable heat and texture simply by swapping mild or hot green chilies and adding more sauce for a saucier finish.
- Feeds a family or a small crowd with minimal cleanup because it bakes in a single 9 by 13 inch dish.
I have adapted this recipe many times, using rotisserie chicken when I am short on time and adding a few fresh herbs when I want brightness. My kids love the melty cheeses and the adults appreciate that it reheats well. This balance of simplicity and comfort is why it appears on our menu at least once a month.
Ingredients
- Cooked chicken: Use about 2 cups of shredded cooked chicken. Rotisserie chicken works well and saves time. Aim for white and dark meat mixed for juiciness.
- Cheddar cheese: 1 cup shredded for the filling and 1 cup for topping. Choose a sharp variety for more flavor or mild for a gentler profile. Pre shredded is fine, freshly shredded melts better.
- Monterey Jack cheese: 1 cup shredded for the filling and 1 cup for topping. This cheese melts creamy and adds a milky note that balances cheddar.
- Sour cream: 1 cup full fat sour cream creates a smooth, tangy base. Greek style works too but reduce slightly for thickness adjustments.
- Cream of chicken soup: 1 can 10.5 ounces. This provides body and seasoned background notes so the filling stays saucy as it bakes.
- Diced green chilies: 1 can 4 ounces, undrained. These add mild, tangy heat and small pieces that distribute through the filling evenly.
- Flour tortillas: 8 small tortillas. Look for medium or small 6 to 8 inch tortillas for even rolling and baking.
- Enchilada sauce: 1 to 1 and 1 quarter cups optional for topping. Pick red enchilada sauce for classic warmth or green salsa for a fresher profile.
- Salt and black pepper: Season to taste. Start with a half teaspoon salt and a quarter teaspoon black pepper then adjust after mixing.
Instructions
Preheat and prepare pan: Preheat your oven to 350 degrees Fahrenheit and lightly grease a 9 by 13 inch baking dish. Use cooking spray or a thin swipe of oil to prevent sticking and ensure easy serving. Position an oven rack in the center of the oven for even baking. Make the creamy filling: In a large mixing bowl combine 1 cup sour cream, one 10.5 ounce can of cream of chicken soup, and the 4 ounce can of diced green chilies with their juice. Whisk until smooth so the soup blends into the sour cream creating a uniform sauce base. Season with salt and black pepper to taste. Add chicken and cheese: Stir in 2 cups shredded cooked chicken, 1 cup shredded cheddar and 1 cup shredded Monterey Jack until evenly distributed. The residual moisture from the chicken will marry with the sauce so the filling remains moist but not soupy. Taste and adjust seasoning if needed. Layer a base of sauce: Spread a thin layer of the prepared sauce over the bottom of the greased baking dish. This prevents the tortillas from sticking and adds flavor under the rolled pieces. Fill and roll tortillas: Spoon about three to four tablespoons of the chicken mixture down the center of each tortilla. Roll each tortilla tightly and place seam side down in the baking dish. Arrange them snugly so they support each other and hold their shape while baking. Top and bake: Pour any remaining sauce evenly over the filled tortillas. If using enchilada sauce also spoon it over now using one to one and one quarter cups for extra moisture. Sprinkle the remaining 1 cup cheddar and 1 cup Monterey Jack evenly across the top. Bake for 20 to 30 minutes until the casserole is bubbling and the cheese is melted and lightly golden at the edges. Rest and serve: Allow the pan to cool for five minutes before serving. This short rest helps the filling set so each piece slices cleanly. Serve with fresh cilantro, lime wedges, and a side of salsa or rice if desired.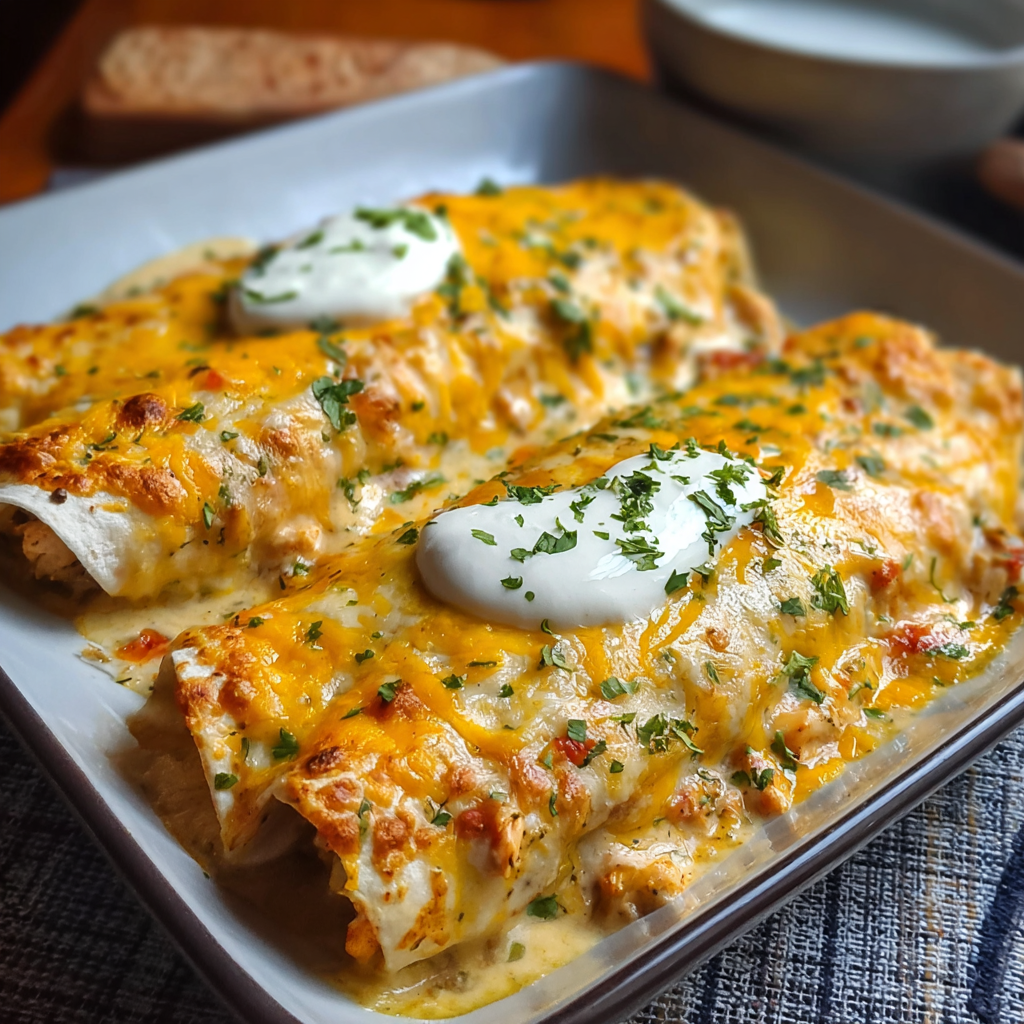
You Must Know
- This dish stores well in the refrigerator for up to three days when covered tightly in an airtight container or wrapped with foil and plastic wrap.
- It also freezes well for up to three months. Flash freeze individual rolls on a tray then transfer to freezer safe bags for best texture retention.
- Because it contains dairy and wheat this is not suitable for those avoiding those allergens unless substitutions are made such as dairy free cheese and gluten free tortillas.
- The combination of two cheeses gives both flavor and meltability. Monterey Jack provides creaminess while sharp cheddar adds a bold note.
- Using a rotisserie bird is an easy shortcut that keeps the dish fast without sacrificing taste.
My favorite aspect is how forgiving it is. I have assembled it with leftover turkey and added chopped roasted poblanos when I wanted more depth. Family members often tell me the reheated portions the next day taste even better because the flavors have had time to meld. This recipe has made potlucks simple and reliable.
Storage Tips
For short term storage cover the baking dish tightly with aluminum foil and refrigerate for up to three days. To reheat from cold, cover with foil and warm at 325 degrees Fahrenheit until heated through about 15 to 20 minutes depending on portion size. For freezing, arrange individual rolls on a tray and freeze until firm, then transfer to a freezer safe container for up to three months. Reheat from frozen covered at 350 degrees Fahrenheit until the center reaches 165 degrees Fahrenheit, then uncover to refresh the top for a few minutes.
Ingredient Substitutions
If you need dairy free options substitute plant based sour cream and dairy free cream soup alternatives and choose vegan cheddar and Monterey Jack style shreds. For a gluten free version swap in corn tortillas or gluten free flour tortillas; if you use corn tortillas warm them briefly to make rolling easier. To lighten the dish swap half the sour cream for plain Greek yogurt which keeps the tang and adds protein while reducing overall fat. If you prefer more heat, swap canned mild green chilies for a 4 ounce can of chopped green chiles marked spicy or add a diced jalapeño to the filling.
Serving Suggestions
Serve these on a warm platter with garnishes such as chopped cilantro, sliced green onions, homemade pico de gallo, and lime wedges to brighten the richness. A simple side of Spanish rice or cilantro lime rice pairs nicely, as does a crisp cabbage slaw or a light romaine salad with a citrus vinaigrette. For entertaining present the tray alongside complementary bowls of sliced avocados, sour cream, and pickled onions so guests can tailor each plate.
Cultural Background
This style of rolled, sauced, and baked filled tortillas draws on Tex Mex tradition where American and Mexican cooking meet. Enchiladas have a long history in Mexican cuisine, traditionally filled with stews or shredded meats and soaked in chile based sauces. The version here reflects American comfort adaptations with a creamy filling using canned soup and familiar cheeses which became popular for their convenience and crowd pleasing flavors in mid twentieth century home cooking.
Seasonal Adaptations
In spring and summer add bright elements such as fresh corn kernels and chopped roasted red peppers. In autumn swap chicken for shredded turkey and fold in roasted butternut squash cubes for an earthy note. For winter make the filling heartier by stirring in sautéed mushrooms and spinach. Adjust toppings seasonally too by using fresh herbs in warmer months and warming spices in colder months for added depth.
Meal Prep Tips
Assemble the pan up to 24 hours ahead and keep tightly covered in the refrigerator. If freezing for later, assemble and flash freeze before transferring to bags. Portion into single servings to simplify lunches. When reheating individual portions use a microwave for convenience or an oven for restored texture. Label containers with date and contents for quick meal rotation.
These enchiladas are a small act of comfort that are easy to make, simple to scale, and always welcome at the table. I hope you make them your own and enjoy the warm, cheesy results with family and friends.
Pro Tips
Warm the tortillas for a few seconds in the microwave wrapped in a damp towel to make them easier to roll and less likely to tear.
Grate your own cheese when possible; it melts smoother than pre shredded options which often contain anti caking agents.
Allow the pan to rest five minutes after baking so the filling sets and slices cleanly.
If the filling seems dry add a few tablespoons of milk or extra sour cream to reach desired creaminess.
Use a rotisserie chicken to save time and boost flavor when you are short on prep time.
This nourishing cheesy chicken enchiladas creamy recipe is sure to be a staple in your kitchen. Enjoy every moist, high protein slice — it is perfect for breakfast or as a wholesome snack any time.
FAQs about Recipes
Can I assemble ahead of time?
Yes, you can prepare the pan up to 24 hours ahead. Cover tightly and refrigerate. Add extra baking time if baking from cold.
Can this be frozen?
Yes, freeze for up to three months. Flash freeze individual enchiladas on a tray then transfer to freezer bags. Bake covered from frozen until heated through.
What kind of chicken should I use?
Use cooked, shredded chicken such as rotisserie or leftover roasted chicken. Aim for about 2 cups of meat for this recipe.
Tags
Cheesy Chicken Enchiladas Creamy
This Cheesy Chicken Enchiladas Creamy recipe makes perfectly juicy, tender, and flavorful steak every time! Serve with potatoes and a side salad for an unforgettable dinner in under 30 minutes.
Ingredients
Filling
Tortillas
Topping
Instructions
Preheat and prepare pan
Preheat oven to 350 degrees Fahrenheit. Lightly grease a 9 by 13 inch baking dish with cooking spray or a thin coat of oil to prevent sticking.
Combine sauce base
In a large bowl whisk together 1 cup sour cream, one 10.5 ounce can of cream of chicken soup, and the 4 ounce can of diced green chilies until smooth and uniform.
Add chicken and cheeses
Stir in 2 cups shredded cooked chicken, 1 cup cheddar, and 1 cup Monterey Jack until evenly distributed. Season gently with salt and black pepper and taste to adjust seasoning.
Layer sauce in dish
Spread a thin layer of the sauce over the bottom of the prepared baking dish to prevent sticking and add base flavor.
Fill and roll tortillas
Spoon a portion of the chicken mixture down the center of each tortilla, roll tightly, and place seam side down in the baking dish so they fit snugly together.
Top and bake
Pour remaining sauce over the filled tortillas and optionally spoon 1 to 1 and 1 quarter cups enchilada sauce over top. Sprinkle with remaining 1 cup cheddar and 1 cup Monterey Jack. Bake 20 to 30 minutes until bubbling and cheese is melted.
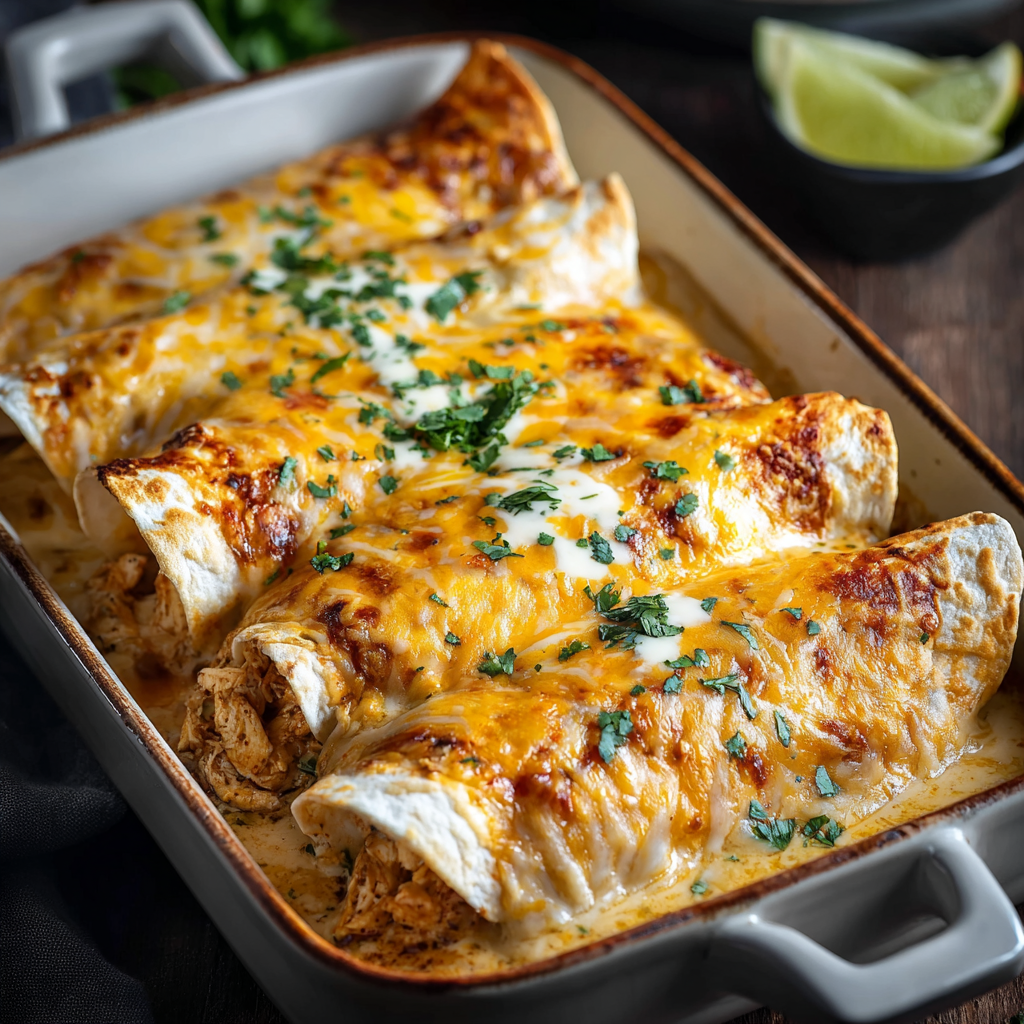
Rest and serve
Let the dish cool for five minutes to allow the filling to set, then serve with fresh garnishes such as cilantro and lime wedges.
Last Step: Please leave a rating and comment letting us know how you liked this recipe! This helps our business to thrive and continue providing free, high-quality recipes for you.
Nutrition
Did You Make This?
Leave a comment & rating below or tag
@easywhiskrecipes on social media!
Categories:
You might also like...

Instant Pot Creamy Chicken and Rice
A quick and comforting one pot dinner of tender chicken, creamy rice, and vegetables cooked together in the Instant Pot for an easy weeknight meal.

Cinnamon Roll Pancake Stacks
Fluffy pancakes swirled with a warm cinnamon filling and finished with a silky cream cheese glaze. Perfect for weekend brunches and cozy mornings.

Caramel Apple Cheesecake Bars
Buttery graham crust, creamy cheesecake, spiced Granny Smith apples, crunchy streusel, and a ribbon of homemade caramel — perfect dessert bars for gatherings.
Did You Make This?
Leave a comment & rating below or tag @easywhiskrecipes on social media!
Rate This Recipe
Share This Recipe
Enjoyed this recipe? Share it with friends and family, and don't forget to leave a review!
Comments (1)
This recipe looks amazing! Can't wait to try it.
Comments are stored locally in your browser. Server comments are displayed alongside your local comments.

Hi, I'm Sophie!
What's Popular

30-Minute Meals!
Join to receive our email series which contains a round-up of some of our quick and easy family favorite recipes.